
Setting Up PinFlow from the Dashboard
Already past the welcome guide? Connect Pinterest, pick boards, set your schedule, and design pins - each from its own PinFlow page.
Updated August 30, 2026 · 6 min read
What PinFlow does
PinFlow takes the products you already sell on Shopify and turns them into Pinterest pins, then posts those pins for you on a schedule. You pick a look once, and PinFlow keeps designing and publishing new pins in the background, so your store stays active on Pinterest without you opening the design tool every day.
This guide sets everything up from PinFlow's own pages - the ones you reach from the dashboard. If you just installed PinFlow and see the welcome setup guide instead, follow Getting Started with PinFlow.
Important
Every pin links back to the matching product page on your own Shopify store. PinFlow does not sync your catalog, add prices, or put shoppable tags on pins. Shoppers browse and check out on your store, exactly as they do today.
Step 1: Open PinFlow
Open PinFlow from Apps in your Shopify admin sidebar. You land on your home dashboard, with Quick Actions and links to each page along the left: Pin Studio, Calendar, Products, Settings, and Scheduling. Everything below is reached from these pages.
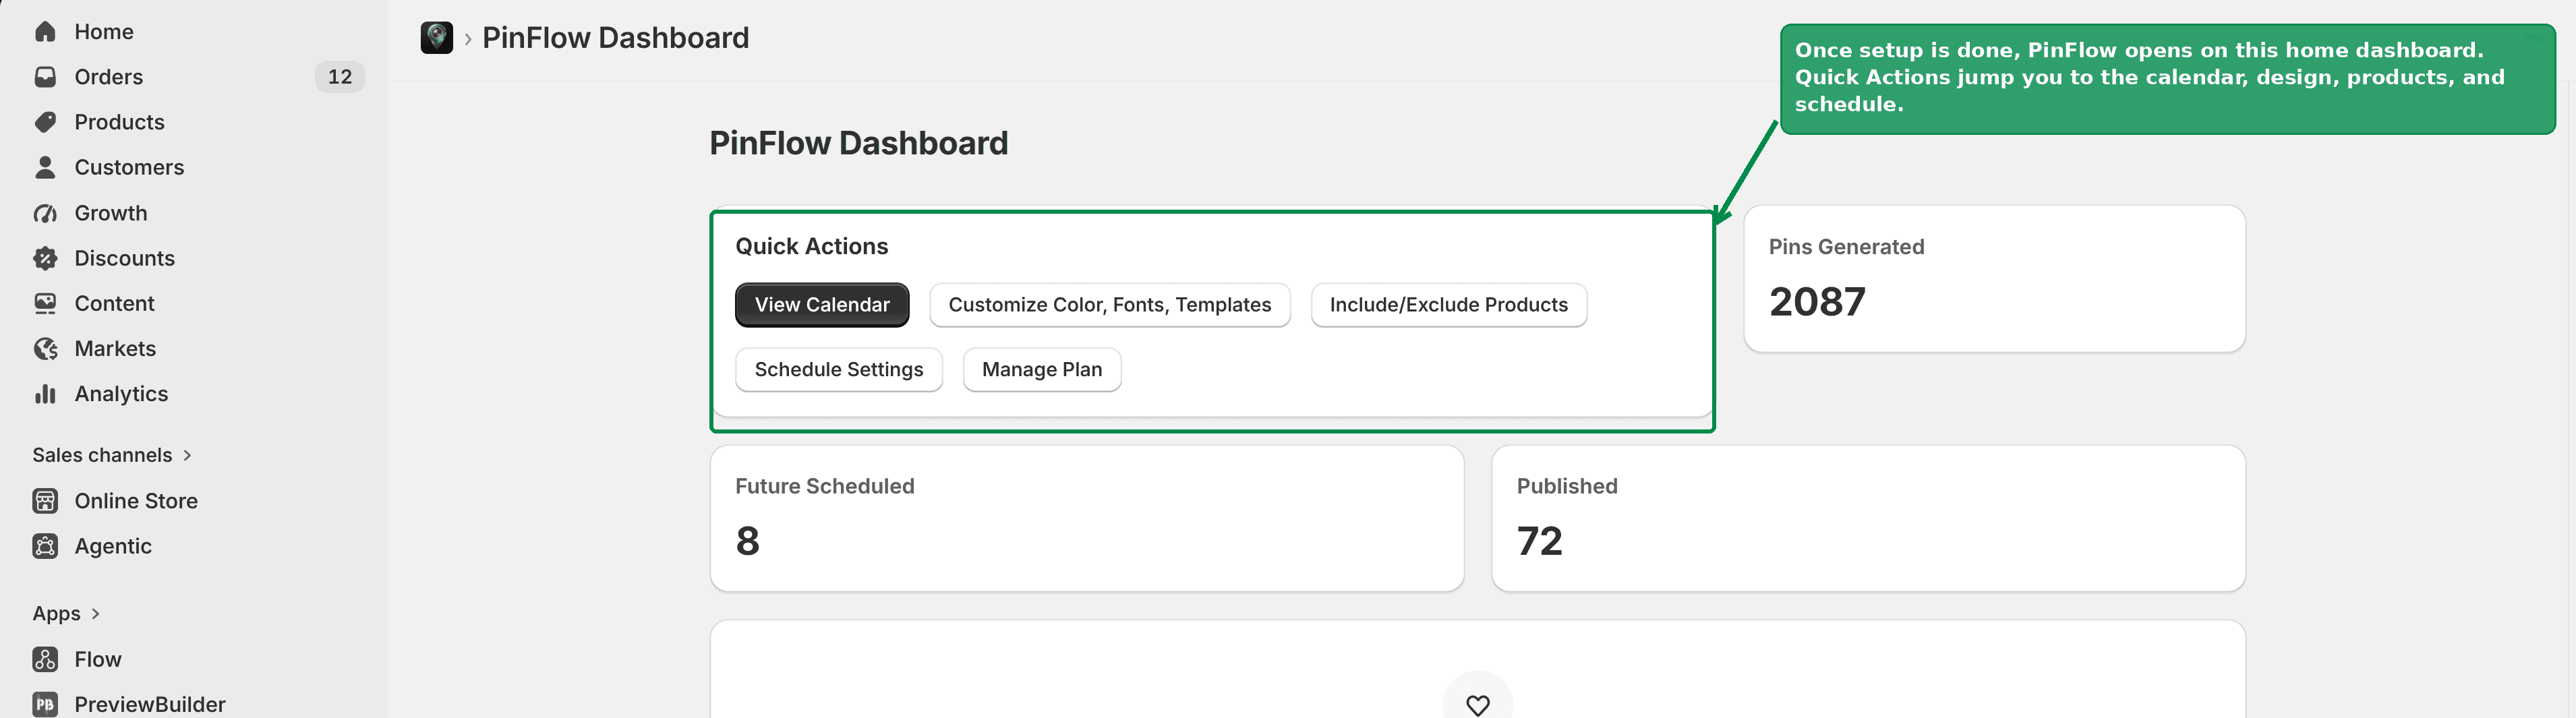 Your PinFlow home dashboard
Step 2: Connect your Pinterest account
Open Settings and go to the Pinterest tab. Click Connect Pinterest. A Pinterest window opens where you log in and allow the connection, then it brings you back. Once linked, you will see your account with a green Connected check.
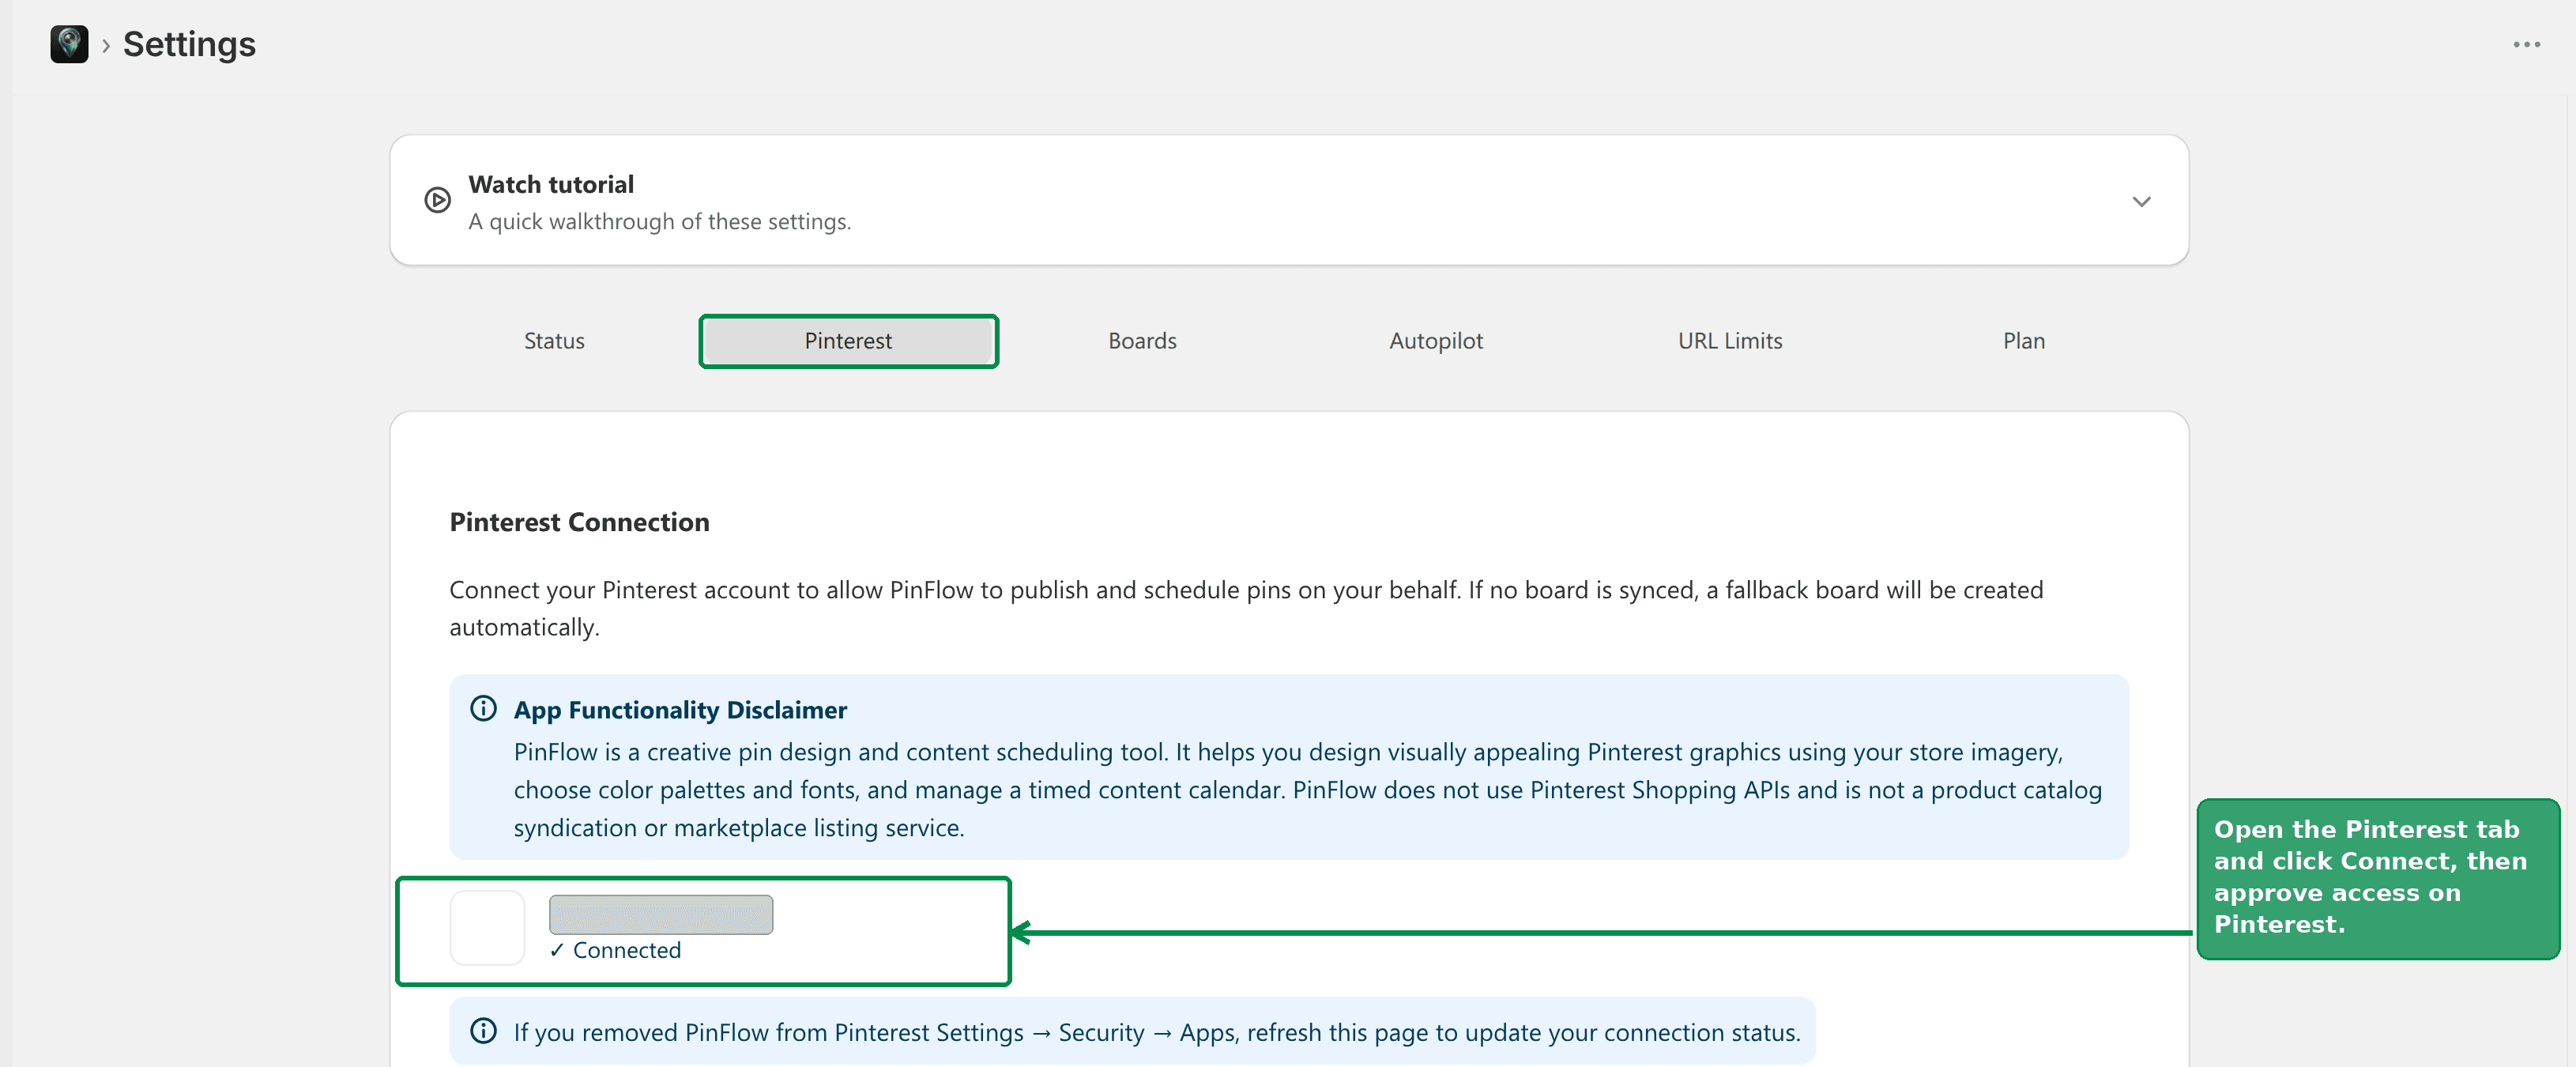 Connecting your Pinterest account from Settings
Step 3: Choose which boards to pin to
In Settings, open the Boards tab. Tick the boards where your pins should go. If you are not sure, start with one or two that match what you sell. Use Sync from Pinterest to pull in your latest boards.
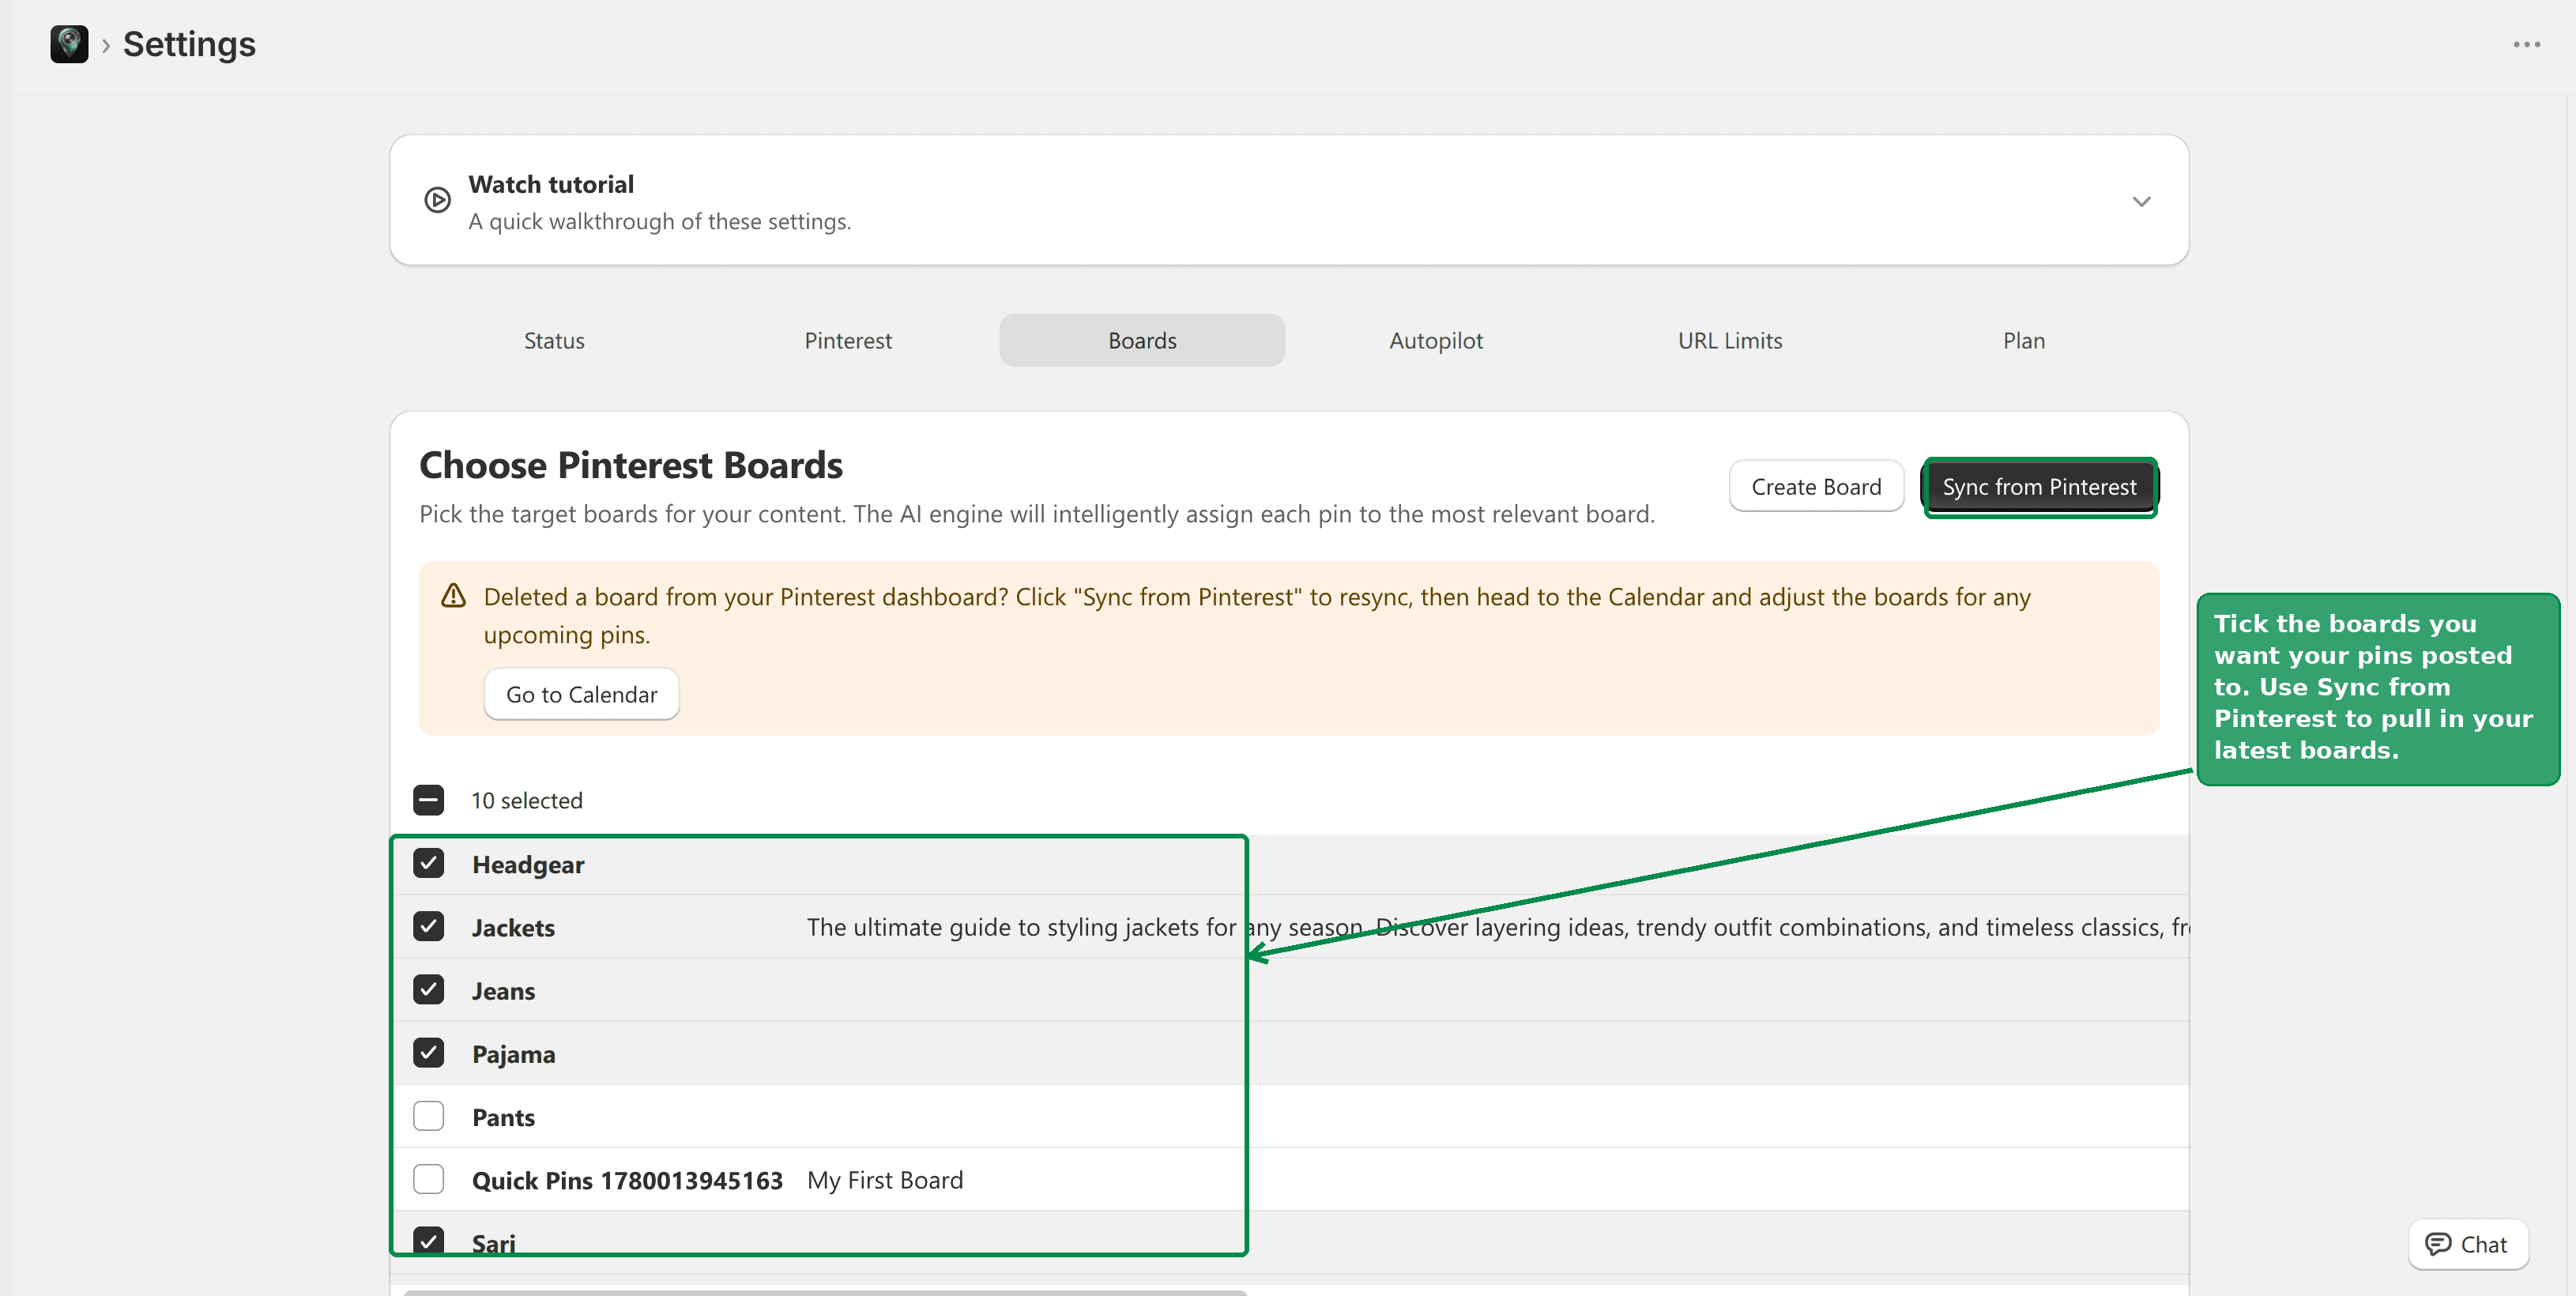 Choosing your Pinterest boards
Step 4: Set your posting schedule
Open the Scheduling page. Here you set:
- Pins per day - how many pins go out each day.
- Time window - the earliest and latest times pins can be posted.
- Timezone - so posts land at the right local time.
The defaults are gentle on purpose, so you do not flood your boards.
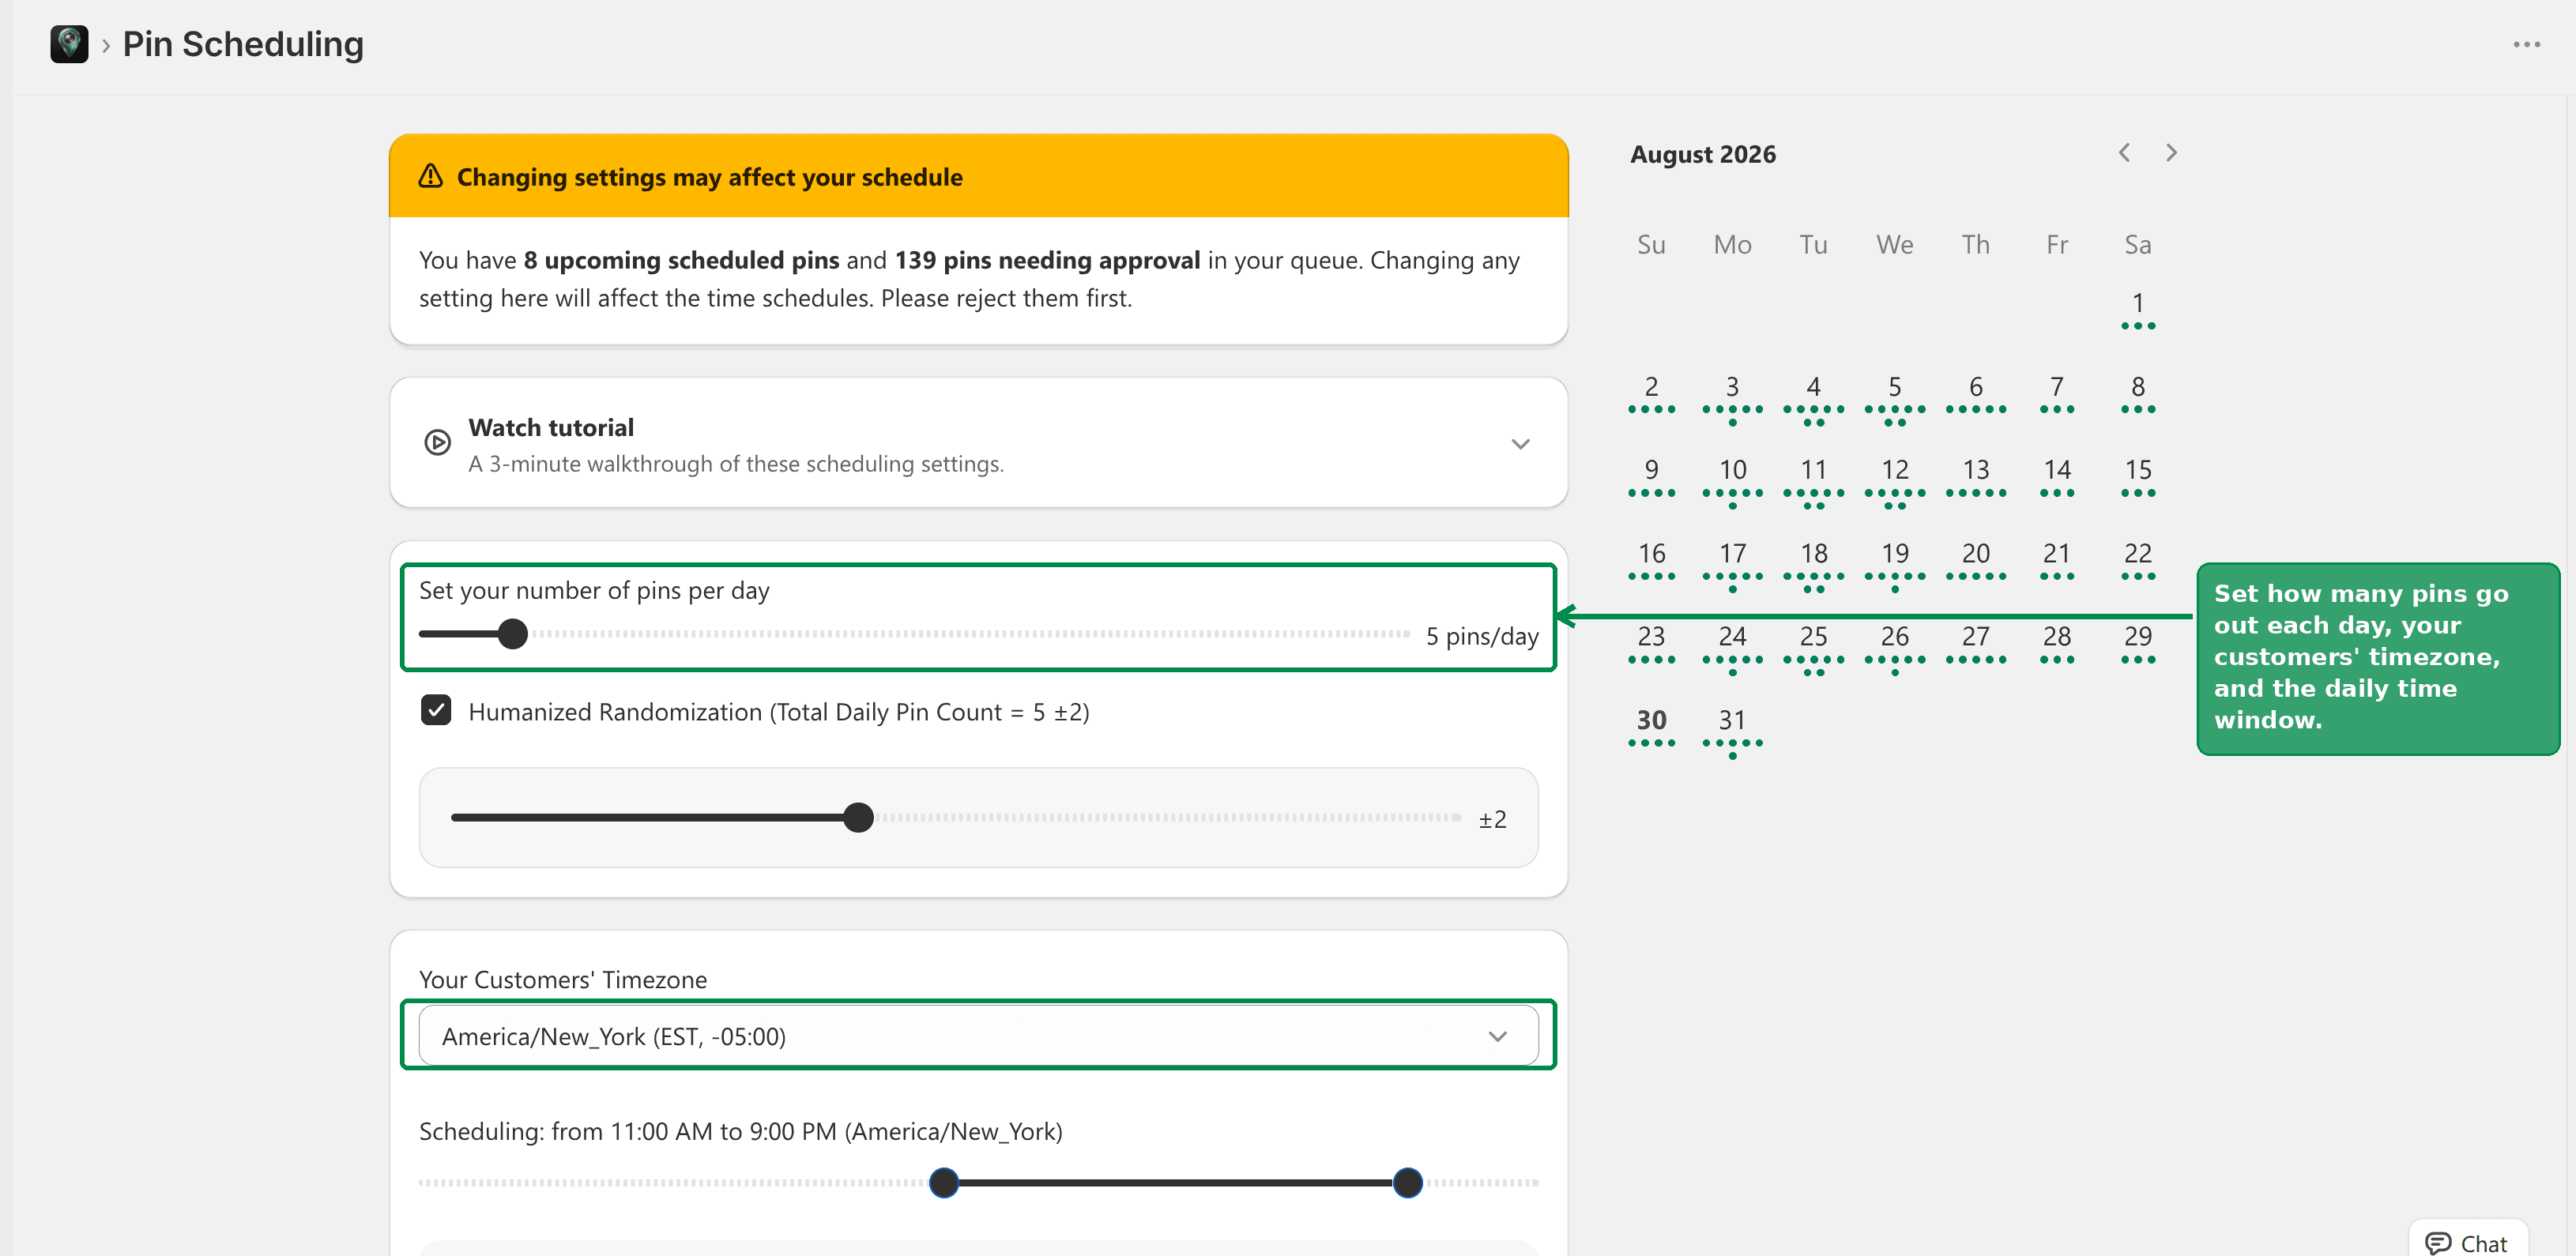 Setting the daily pin count, time window, and timezone
Tip
Start small. A few well-spaced pins a day looks natural on Pinterest and is easier to keep an eye on while you get comfortable. You can always turn it up.
Step 5: Turn on Autopilot
In Settings, open the Autopilot tab. Turn on automatic pin regeneration so PinFlow builds the next batch before your current one runs out - you never have to remember to generate again.
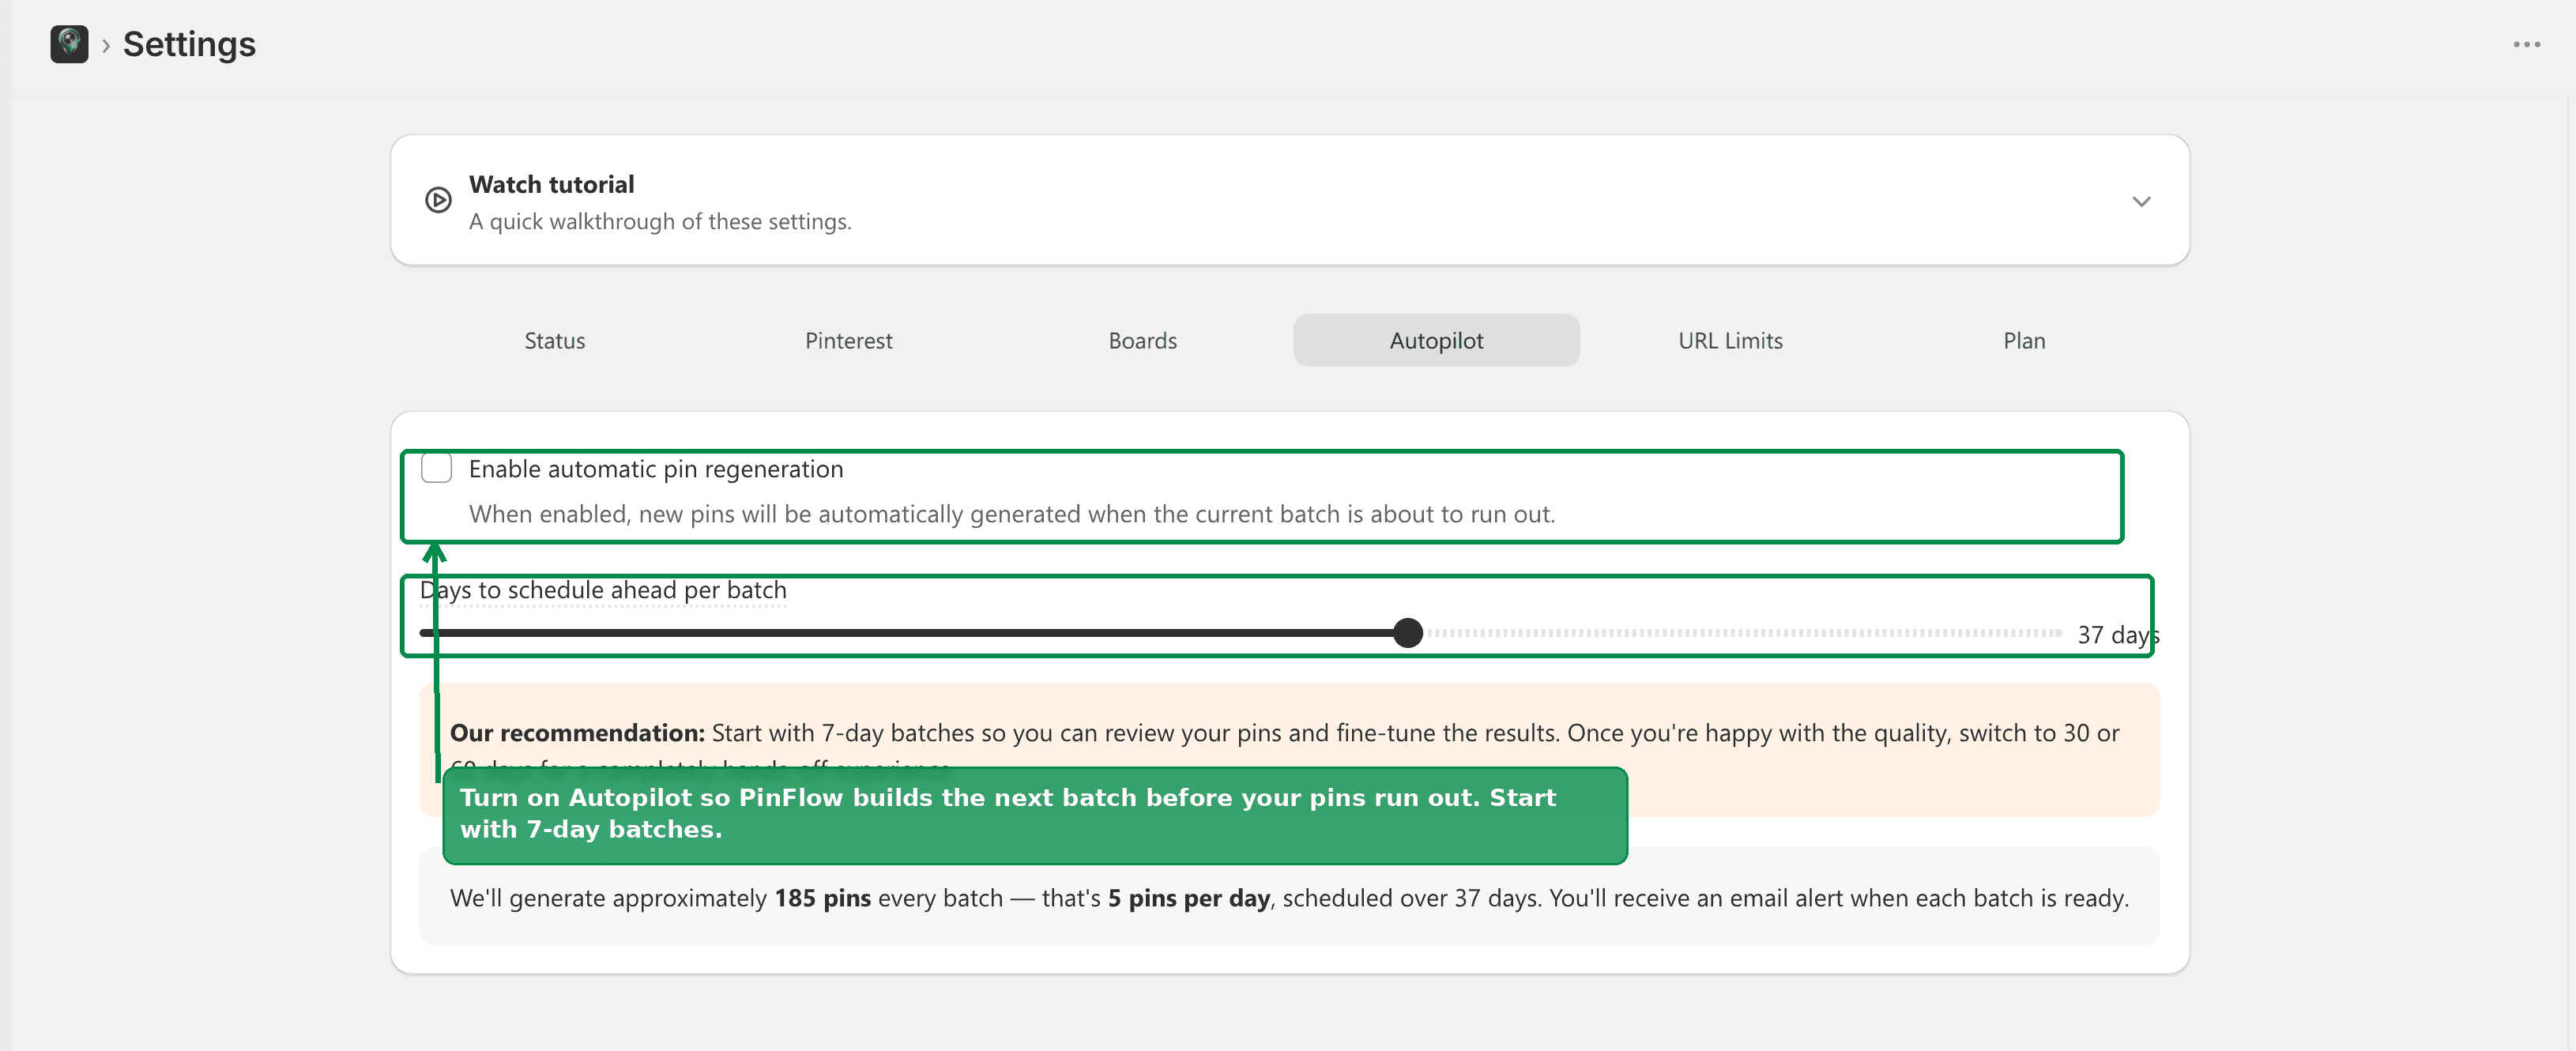 Turning on Autopilot
Step 6: Choose your products
Open the Products page. You can use all of your products, or tick a smaller, curated set - for example just your best sellers or a single collection.
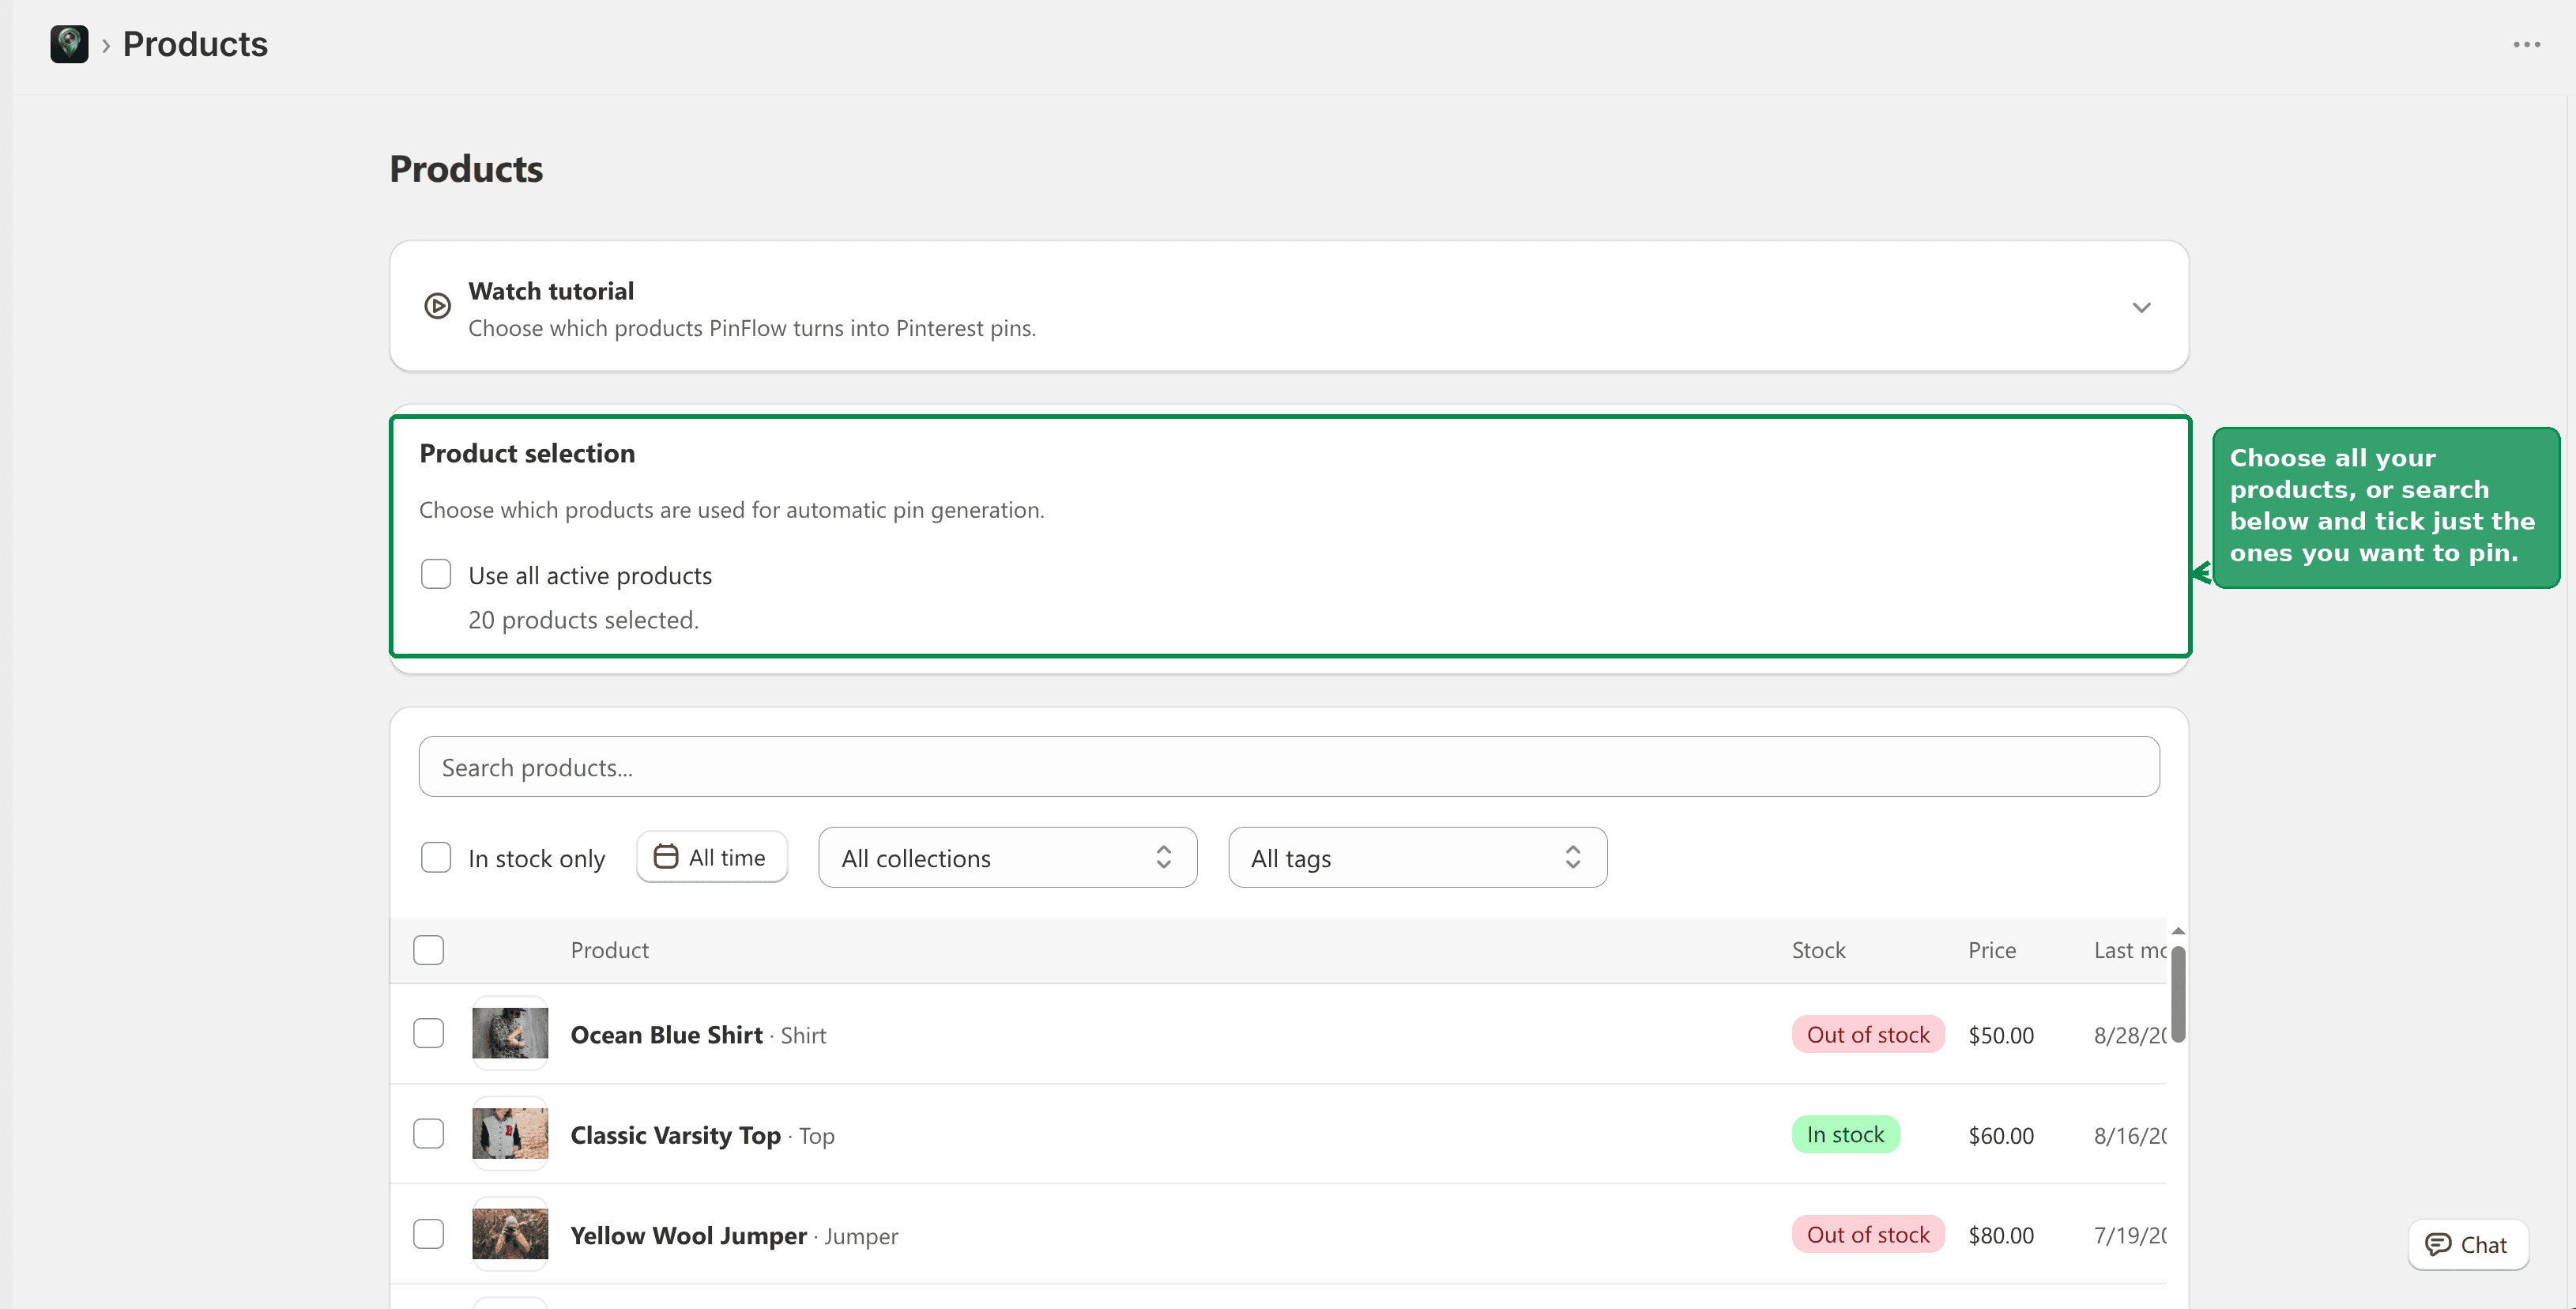 Choosing which products to create pins for
Step 7: Choose your design and templates
Open Pin Studio. Pick your fonts, a color palette, and a template. PinFlow uses your product photos and applies the design on top, so the pins feel like your brand. Try matching the colors to your store so everything looks consistent.
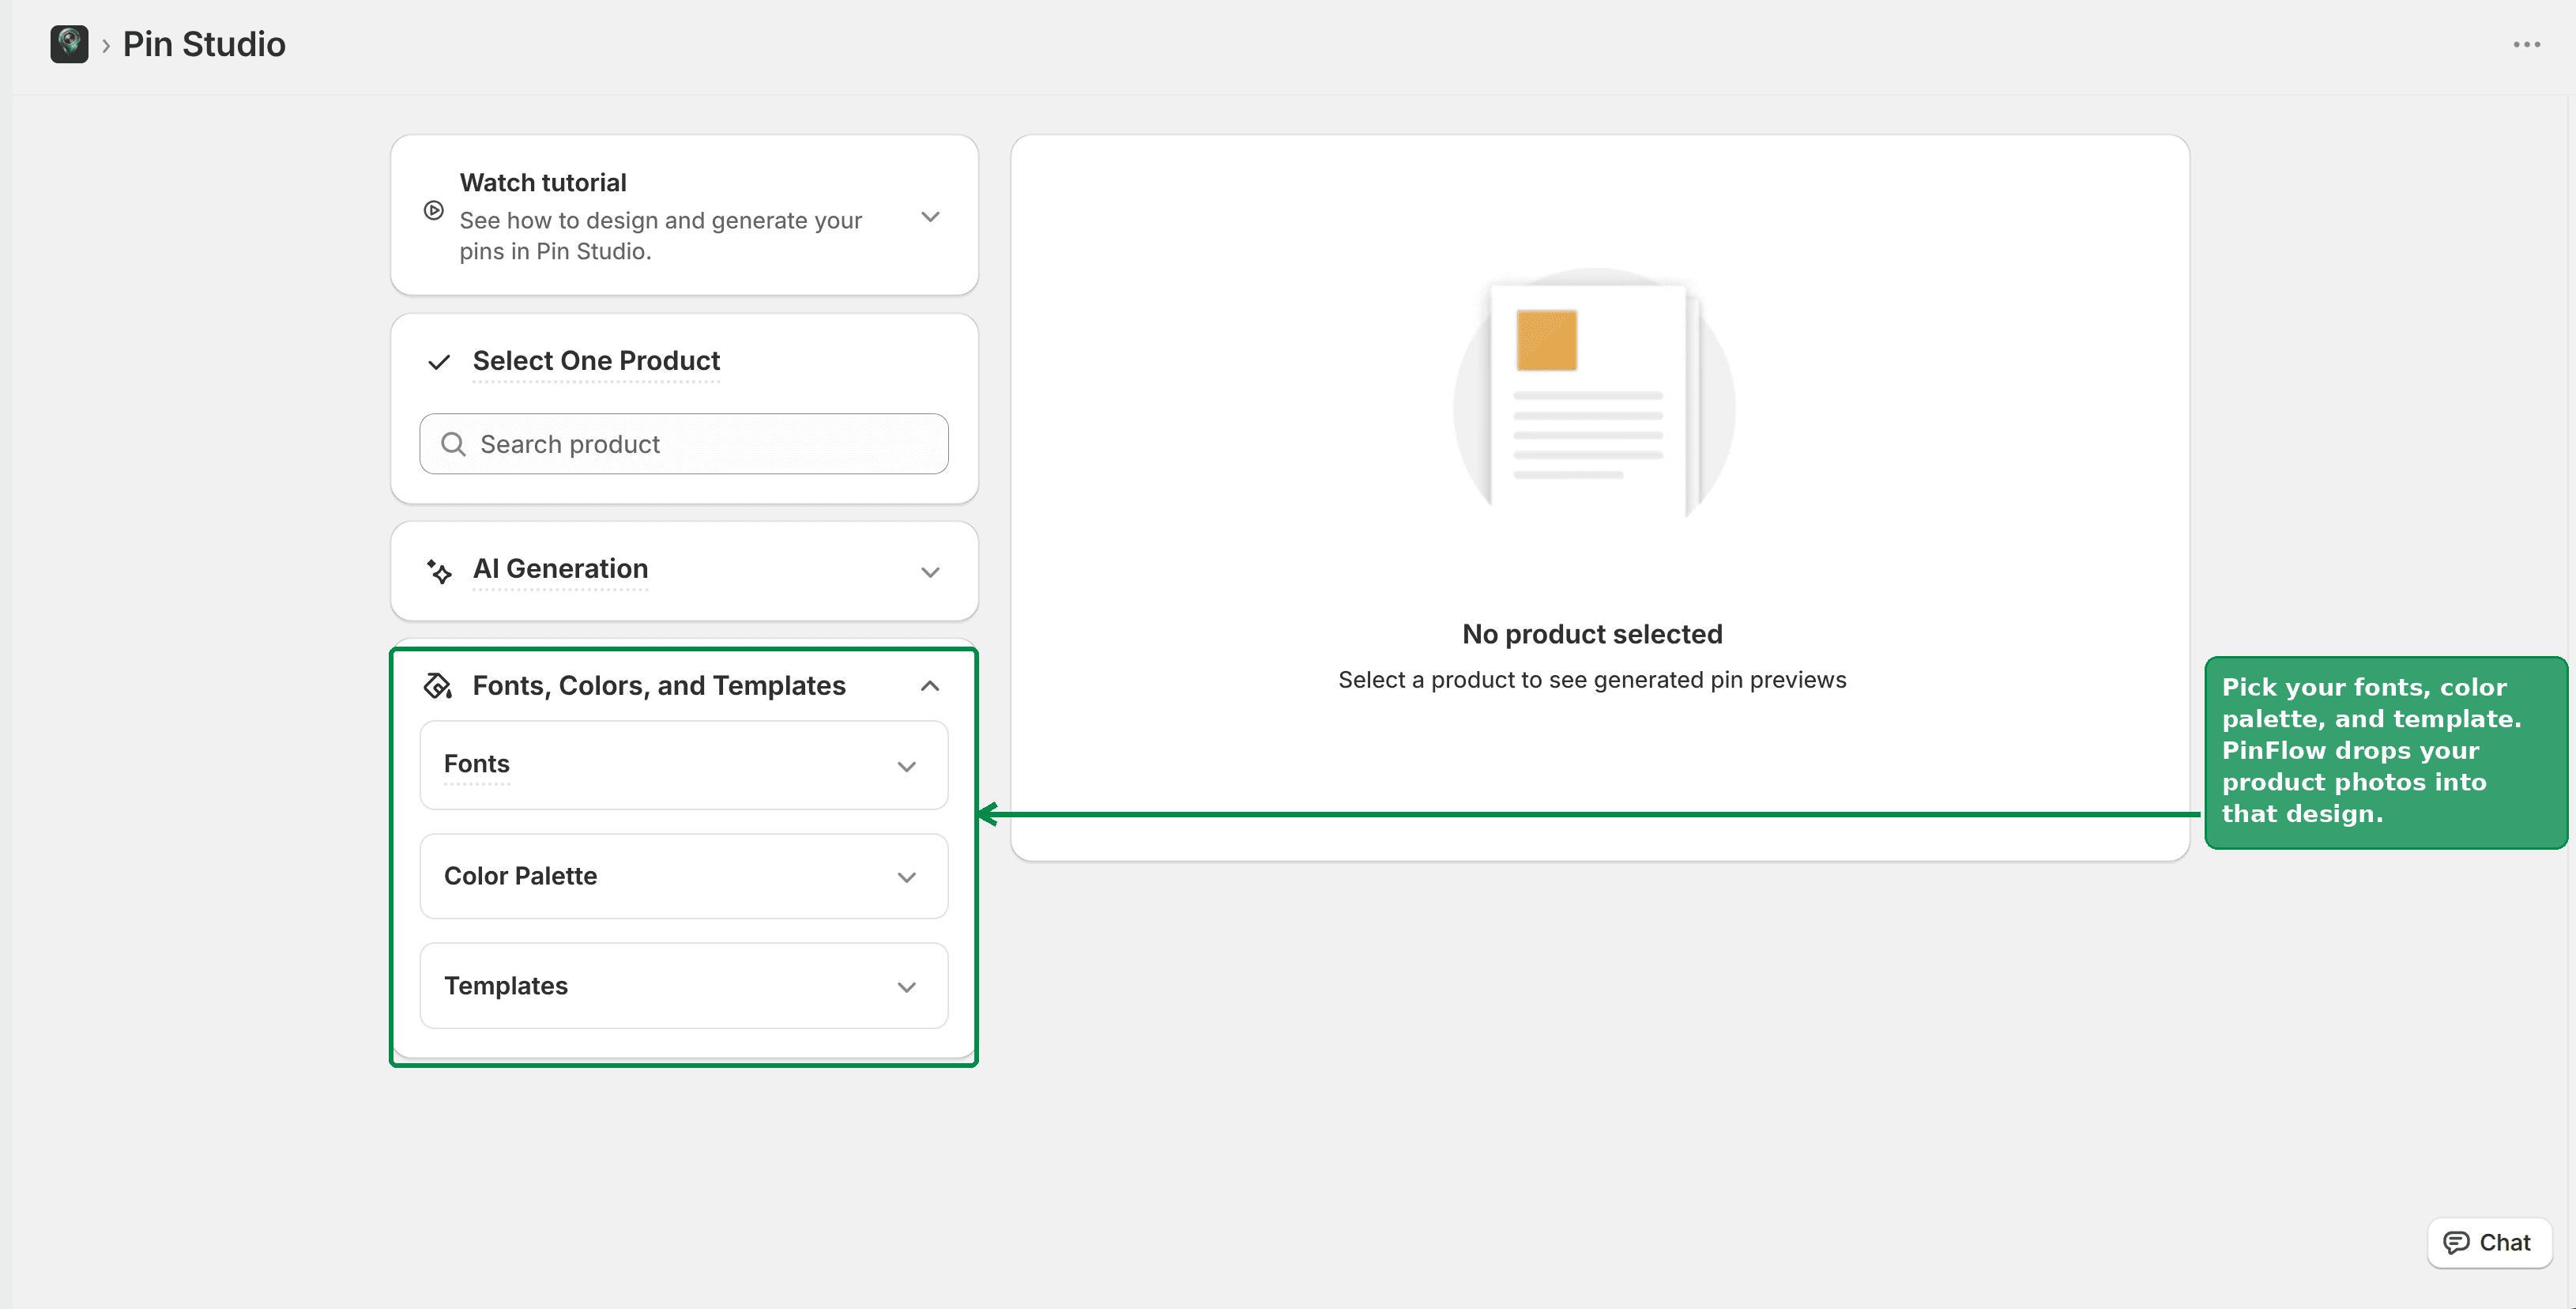 Choosing colors, fonts, and a pin template
Tip
Not happy with how a template looks? It is almost always the template choice, not your product. Try a cleaner, single-image template and pick colors that match your brand.
Step 8: Generate your first batch
Open Settings, stay on the Status tab, and click the Generate button to create your first month of pins. Give it a moment and PinFlow designs them for you.
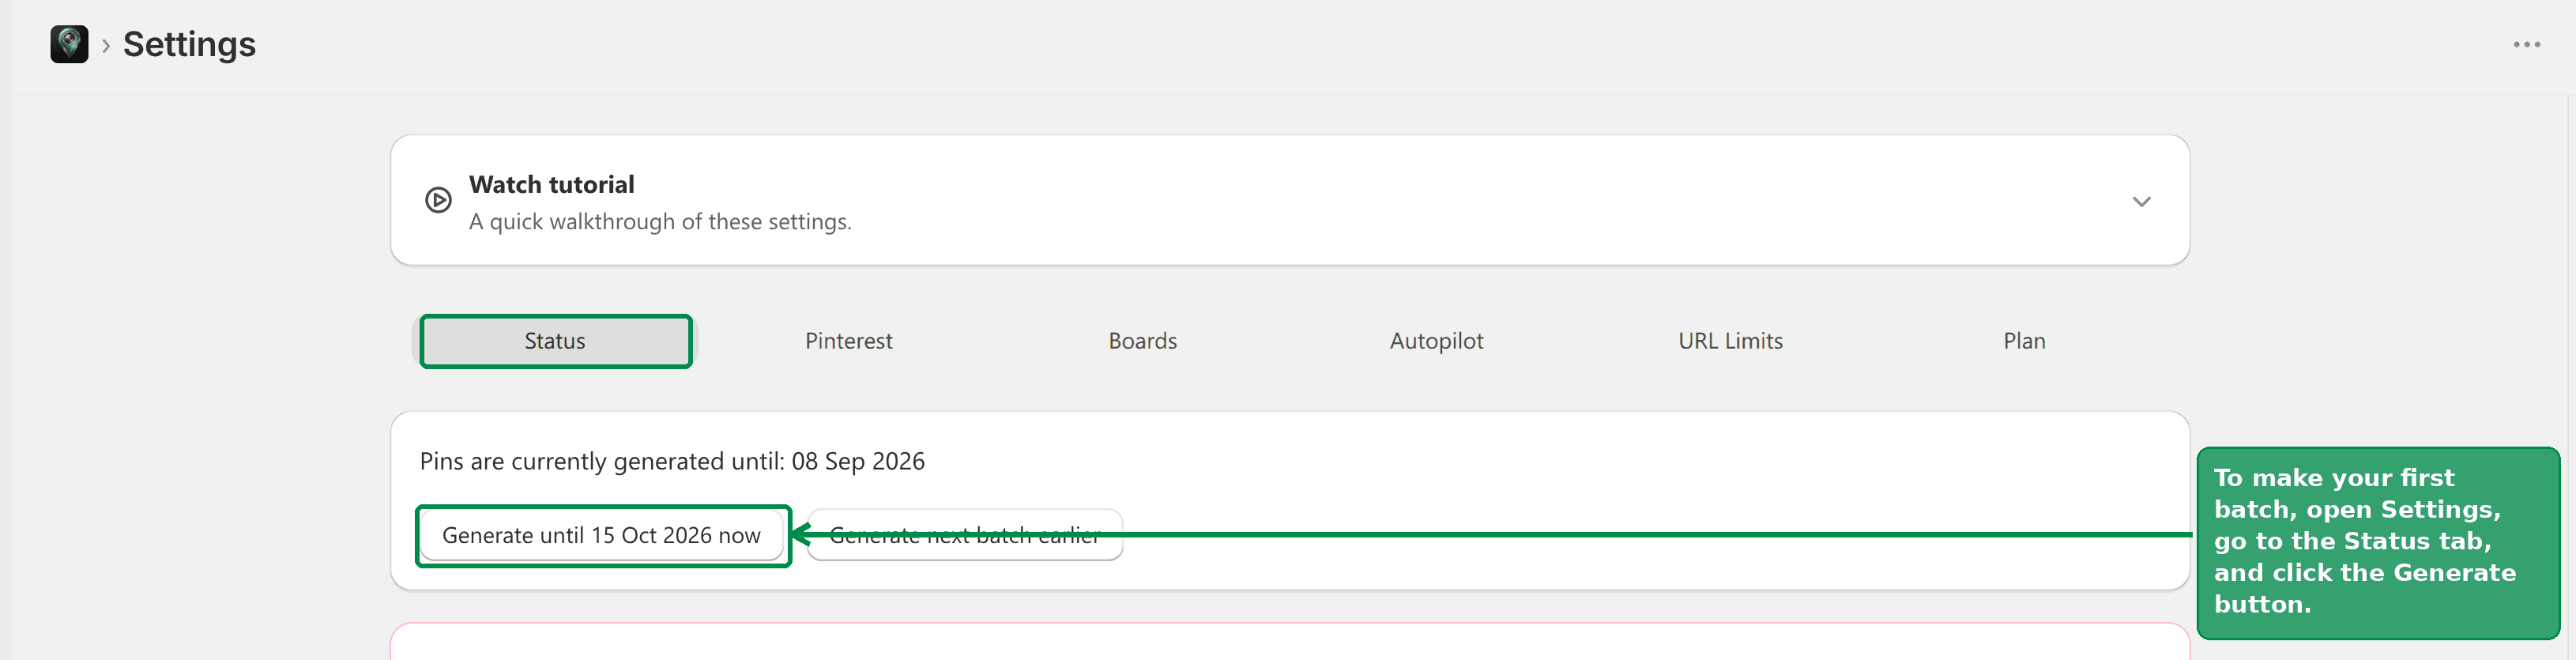 Generating your first batch from Settings
Note
When your batch is ready, PinFlow emails you to review and approve the pins. If you do not see it, check your spam folder.
Open the Calendar to see every pin laid out by date. On the Needs Approval tab you can review each pin before it goes out, swap a template, or adjust a pin. Approve the ones you like with the green check, or use Approve All. Once you are happy, PinFlow posts them on the schedule you set.
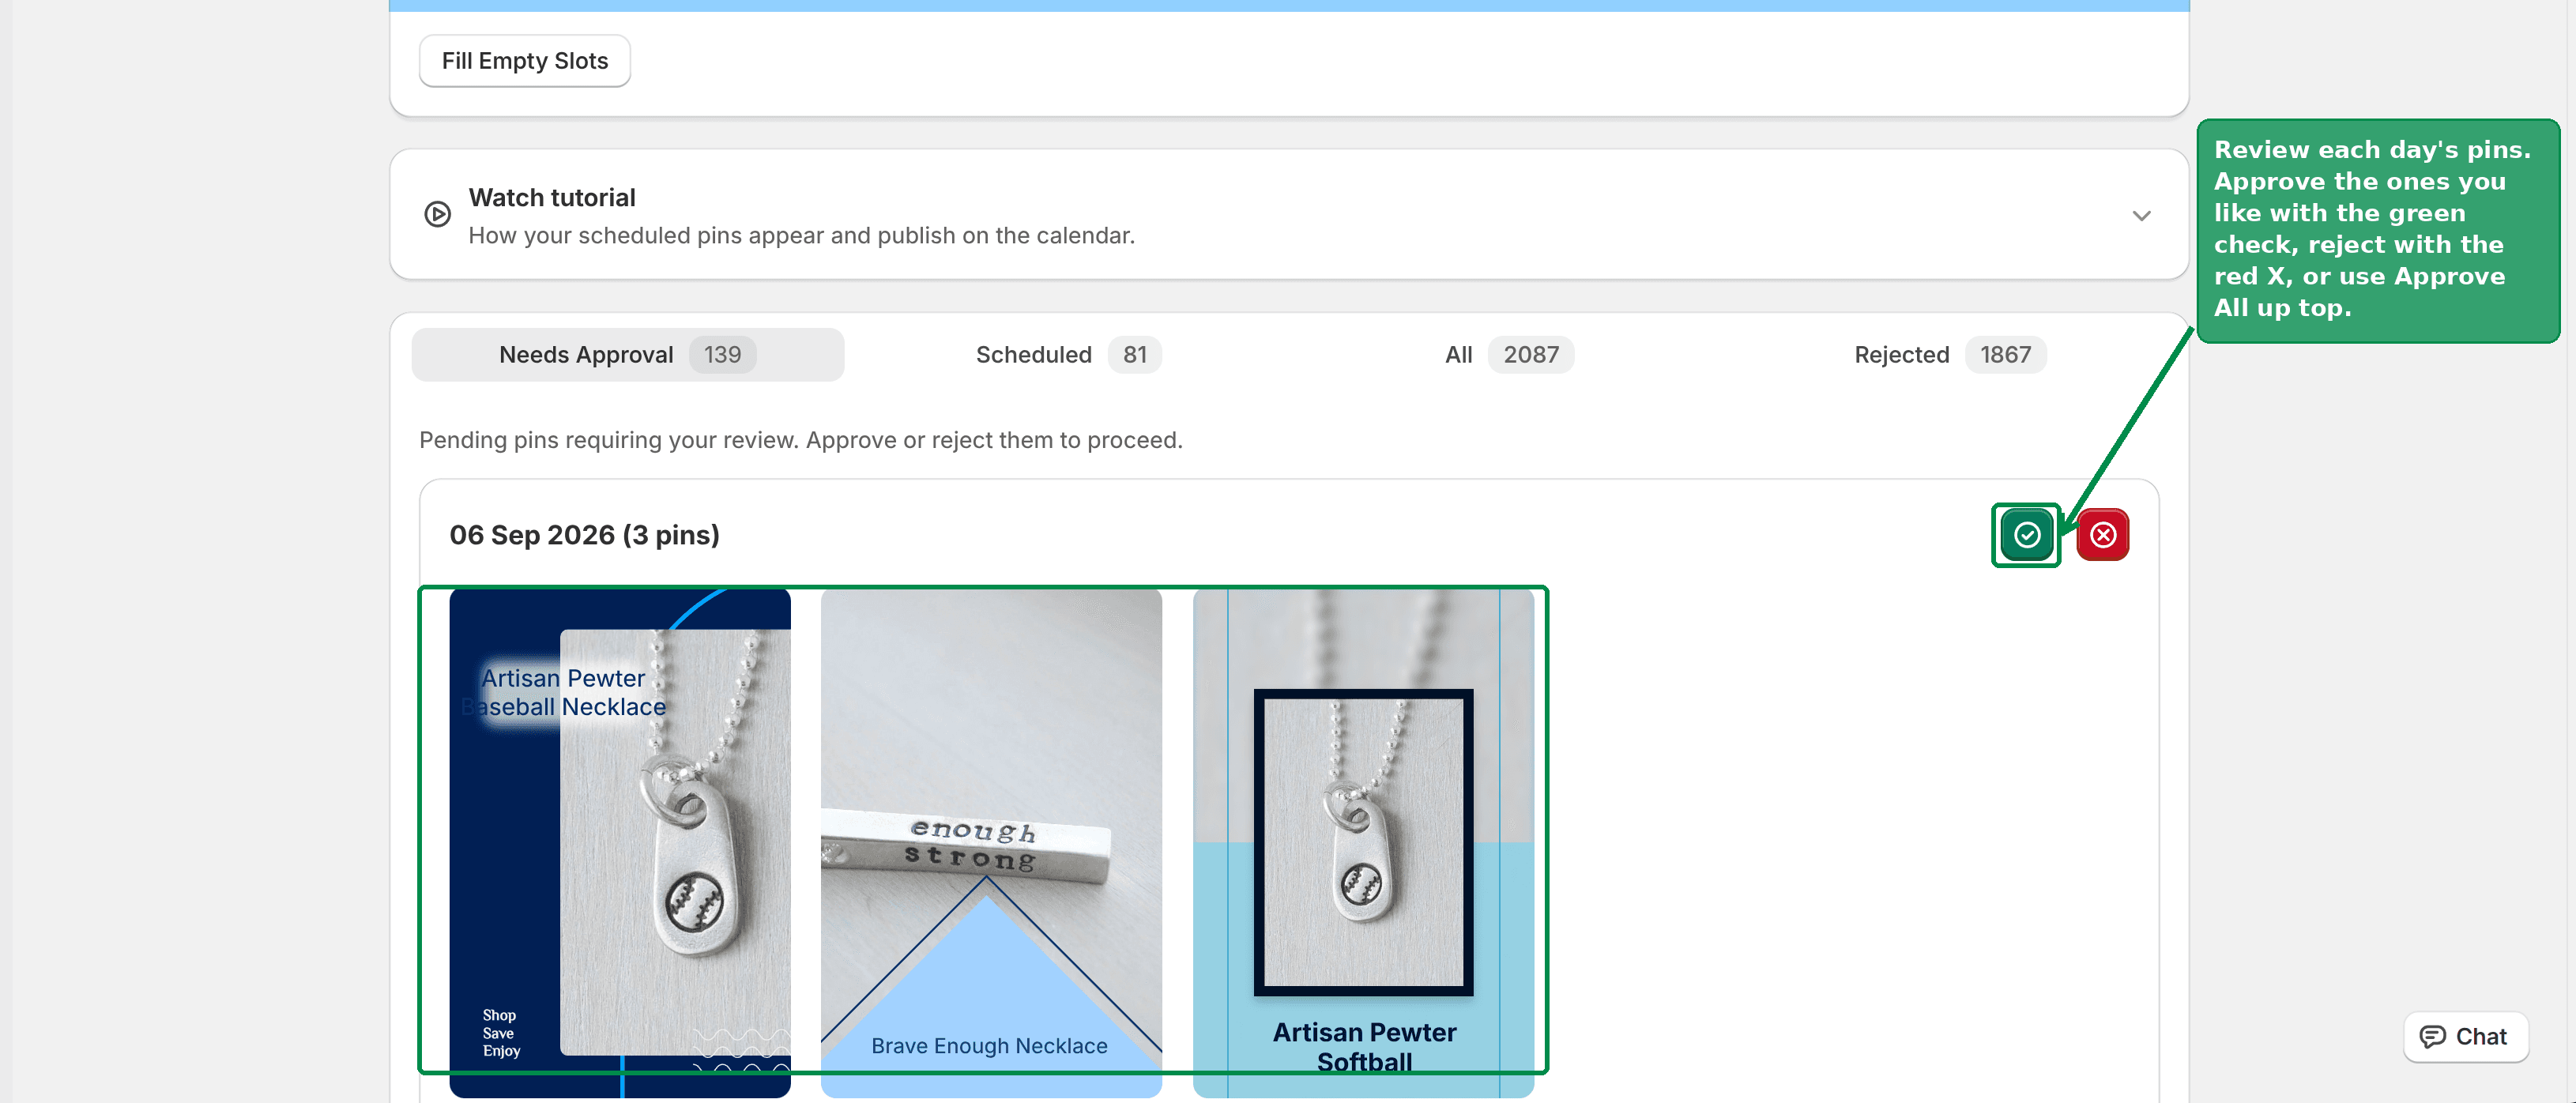 Reviewing your scheduled pins on the Calendar
That's it
You are set up. From here PinFlow keeps designing and posting pins in the background. Whenever you want to make a change:
- Products - add or remove products to pin.
- Pin Studio - tweak your design, colors, and templates, or create a single pin.
- Scheduling - change how often and when pins post.
- Settings - manage boards, Autopilot, and your Pinterest connection.
- Calendar - review, edit, and approve upcoming pins.
Need a hand? Every page in PinFlow has a Help link that brings you to the guide for that page.
Not using PinFlow yet?
PinFlow turns your Shopify catalog into Pinterest pins and posts them on a schedule, automatically. Install it and follow this guide to get your first month of pins live.
Get PinFlow on the Shopify App StoreRelated articles
Getting Started
Getting Started with PinFlow
Your step-by-step guide to setting up PinFlow and generating your first month of Pinterest pins, straight from your Shopify products.
Pin Studio
Upload Your Own Pin Image Instead of a Template
PinFlow used to stamp its own frame, text and graphics on every pin. Two new options skip that: a frameless template, and your own Canva uploads.
Pin Studio
Pinterest Pin Description Character Limit: What Actually Fits
The Pinterest pin description character limit is 500, and the title limit is 100. Mobile cuts both sooner. Here is what fits and how to make AI respect it.