
Shopify Product Customizer: Photo Upload, Frames and a Live Preview
How to let customers upload a photo, pick a frame, add text and approve a live preview before they buy. A tested setup with a Shopify product customizer app, step by step.
By AjayCodeWiz · September 25, 2026 · 9 min read
The problem
A merchant asked on the Shopify Community how to let a customer upload their own photo, drop it into one of five frame designs, type text in three places on top, and then see a preview they approve before paying.
That is a very common request for anyone selling framed prints, photo gifts, signs or personalised decor. Shopify can collect text on a product page, but it has no built-in way to draw the customer's photo, a frame and their text together as a picture on the product page. For that you need a product customizer app.
I built the whole thing on a test store running the Horizon theme. The end result looks like this: the customer's photo sits inside the gold frame they picked, with "OUR FIRST HOME", "The Smiths" and "Est. 2026" drawn on top.
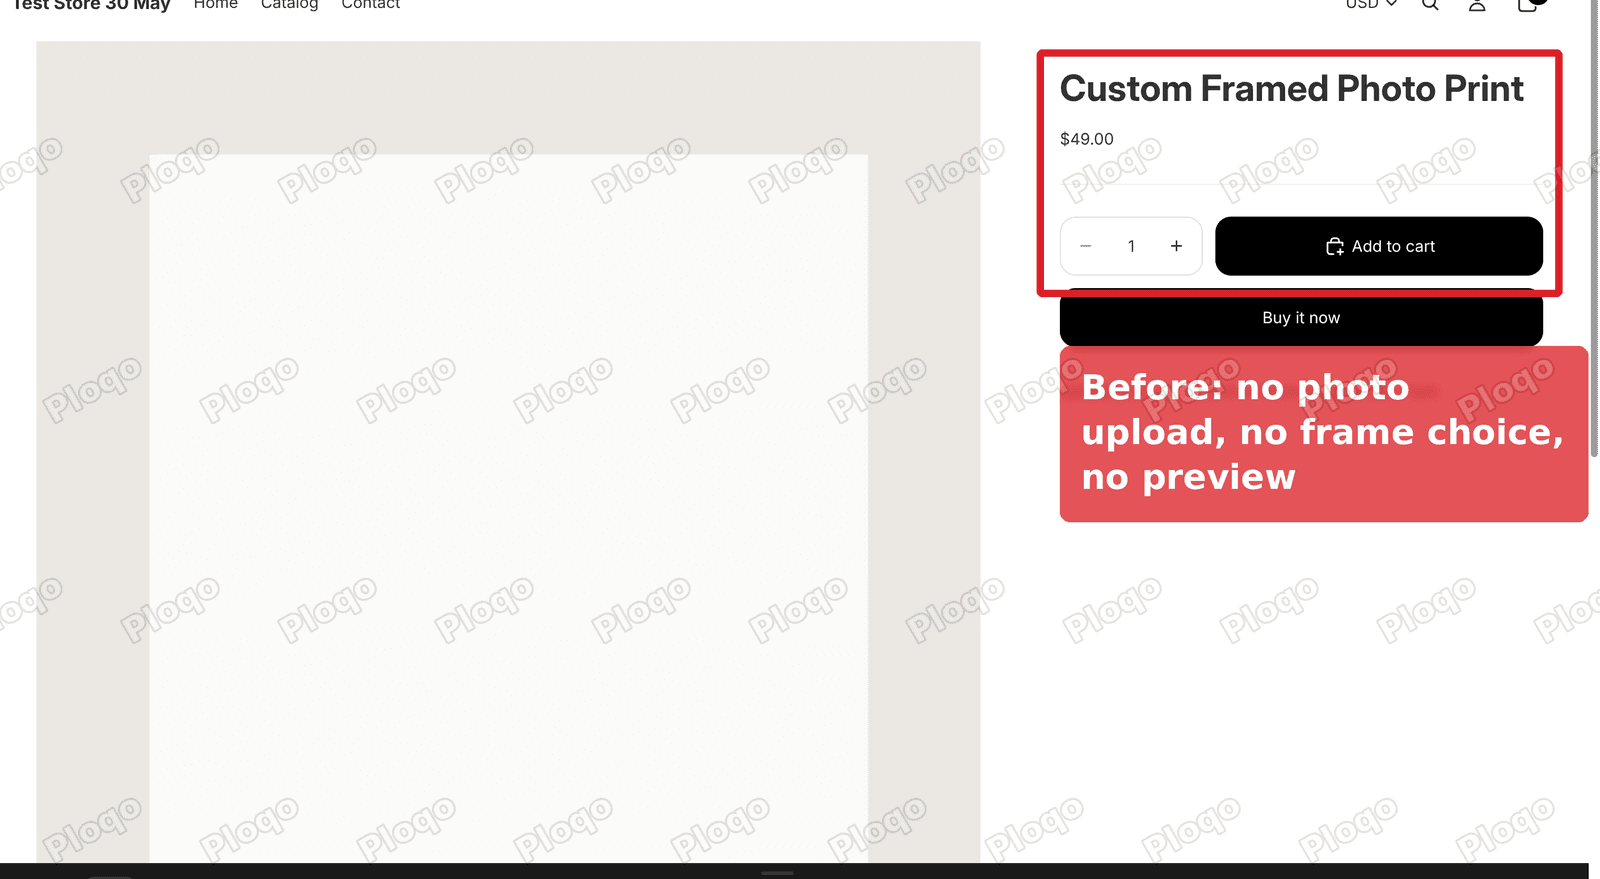 Before: a plain product page with no way to upload a photo or pick a frame
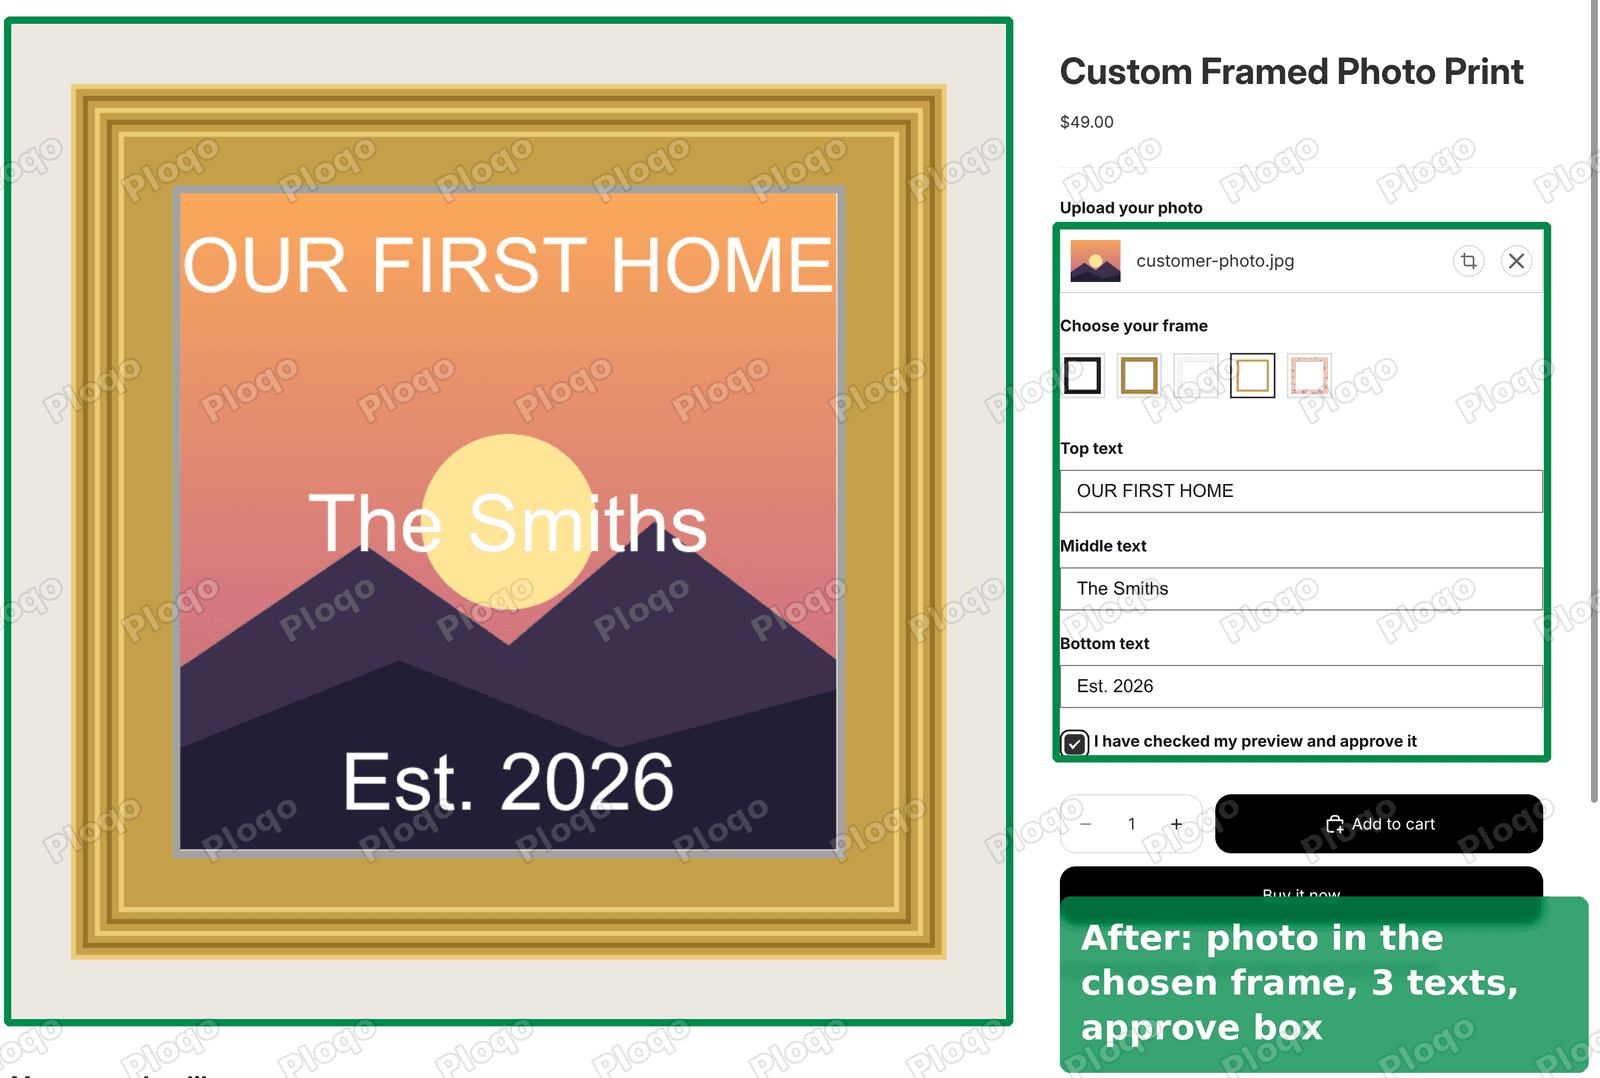 After: the customer's photo in the chosen frame with three lines of text and an approval box
What a product customizer app does
A product customizer (also called a product personalizer) adds extra fields to a product page and draws what the customer enters on top of the product image, live, as they type.
It works in layers, like a stack of see-through sheets:
- The background is a plain photo of your product, for example a blank print.
- The photo layer holds the image the customer uploads.
- The frame layer is a picture of the frame with a see-through middle, so the photo shows through it.
- The text layers hold whatever the customer types.
Each layer has a position on the preview. When the customer changes a field, only that layer is redrawn.
This is different from a plain product options app. An options app adds fields like a text box or a file upload, but it does not draw anything. The customer types "The Smiths" into a box and has to imagine the result. A customizer shows it.
Before you start: prepare your frame artwork
The frames are the part that takes the most thought, so prepare them first.
- Save each frame as a PNG with a see-through middle. PNG is an image format that supports transparency. If the middle of the frame is white instead of see-through, it will cover the customer's photo.
- Make them all the same size and shape. I used square 1000 x 1000 pixel images, which matched the app's default preview size.
- Take one plain photo of the product to use as the background, for example the blank print or the empty frame on a wall.
- Name each frame clearly. Customers see these names when they hover over each option, so "Gold Ornate" is better than "frame-4".
I made five frames for the test: Classic Black, Natural Oak, White Gallery, Gold Ornate and Floral.
Setting up the customizer, step by step
I used Zepto Product Personalizer because it has the most reviews in this category (1,297 at the time of writing, rated 4.9) and it supports photo upload, image choices and text layers in one app. The same idea works in the other apps listed further down, with different button names.
- Install Zepto Product Personalizer from the Shopify App Store.
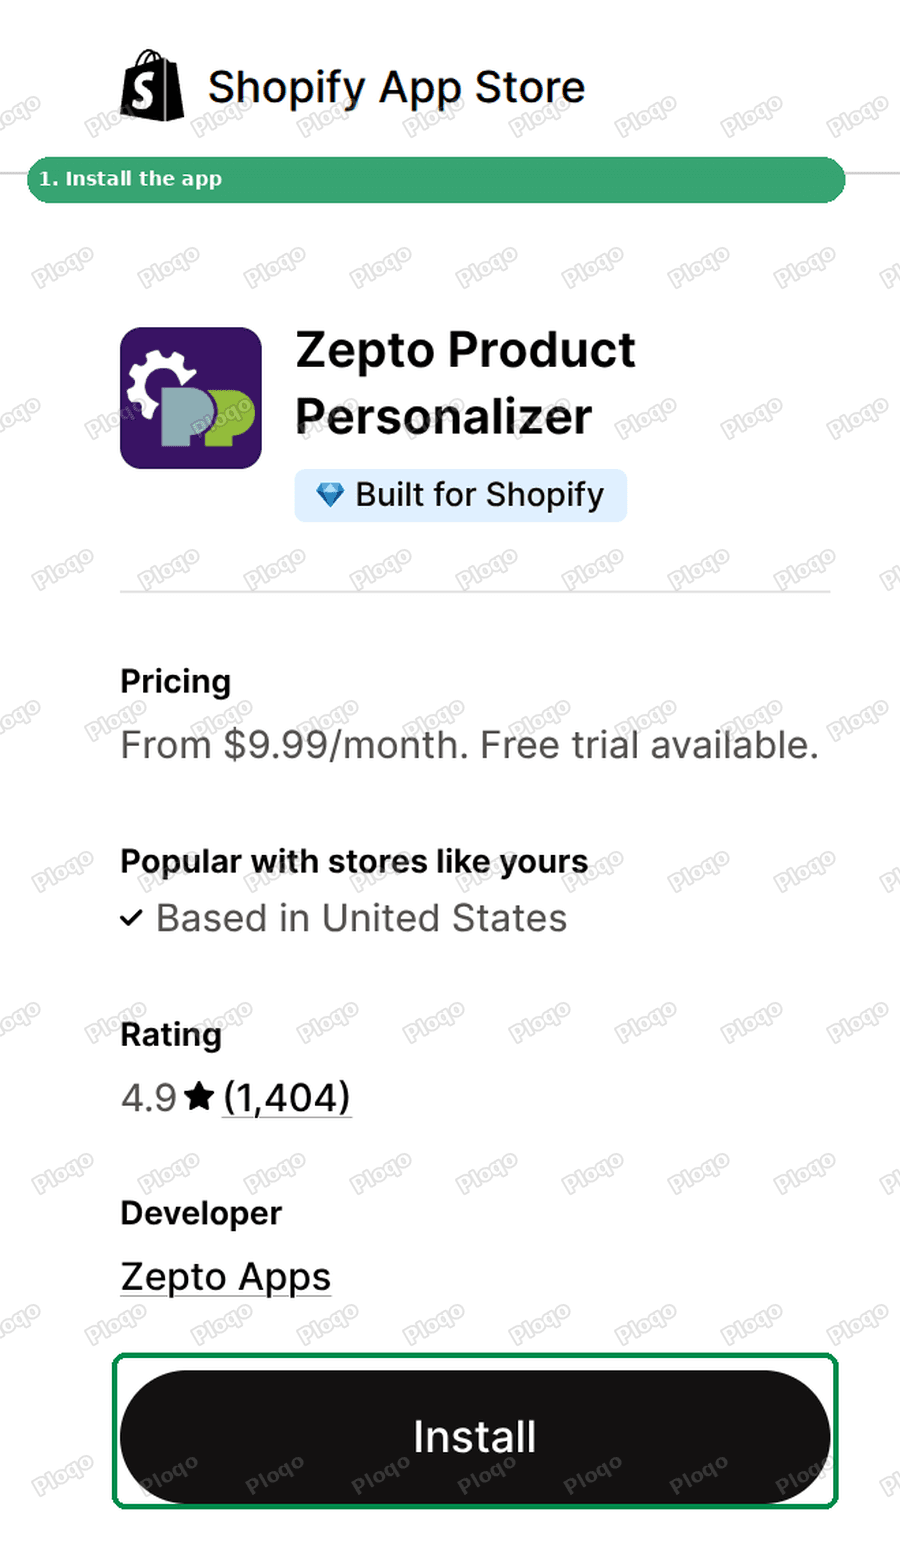 Install Zepto Product Personalizer from the Shopify App Store
- In the app, open Product Options and click + Add Product Option.
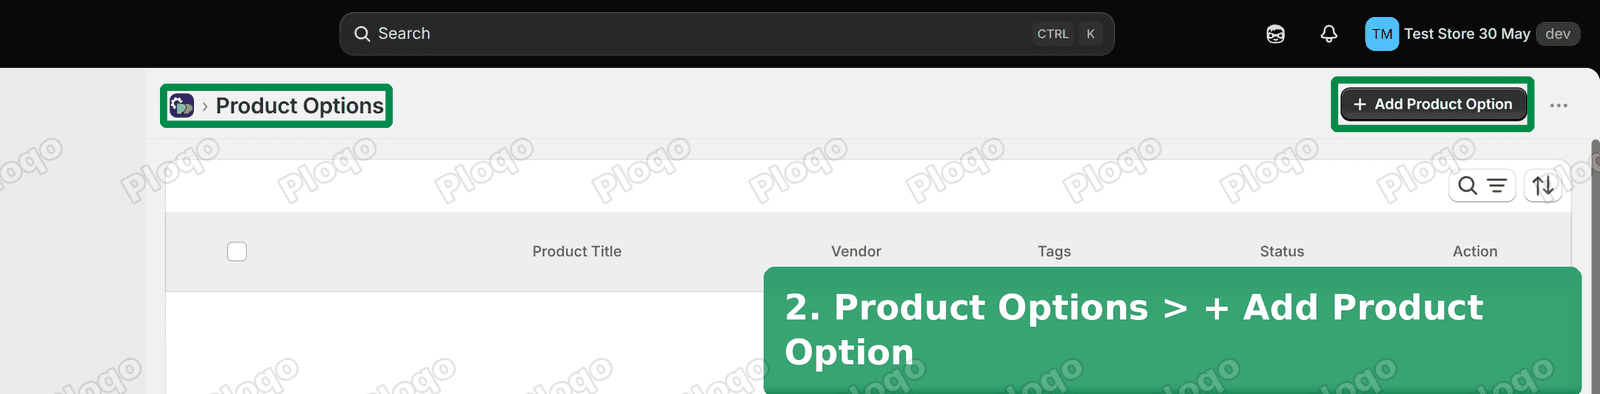 Product Options page with the Add Product Option button
- Tick the product you want to personalise and click Add. Each option set belongs to one product.
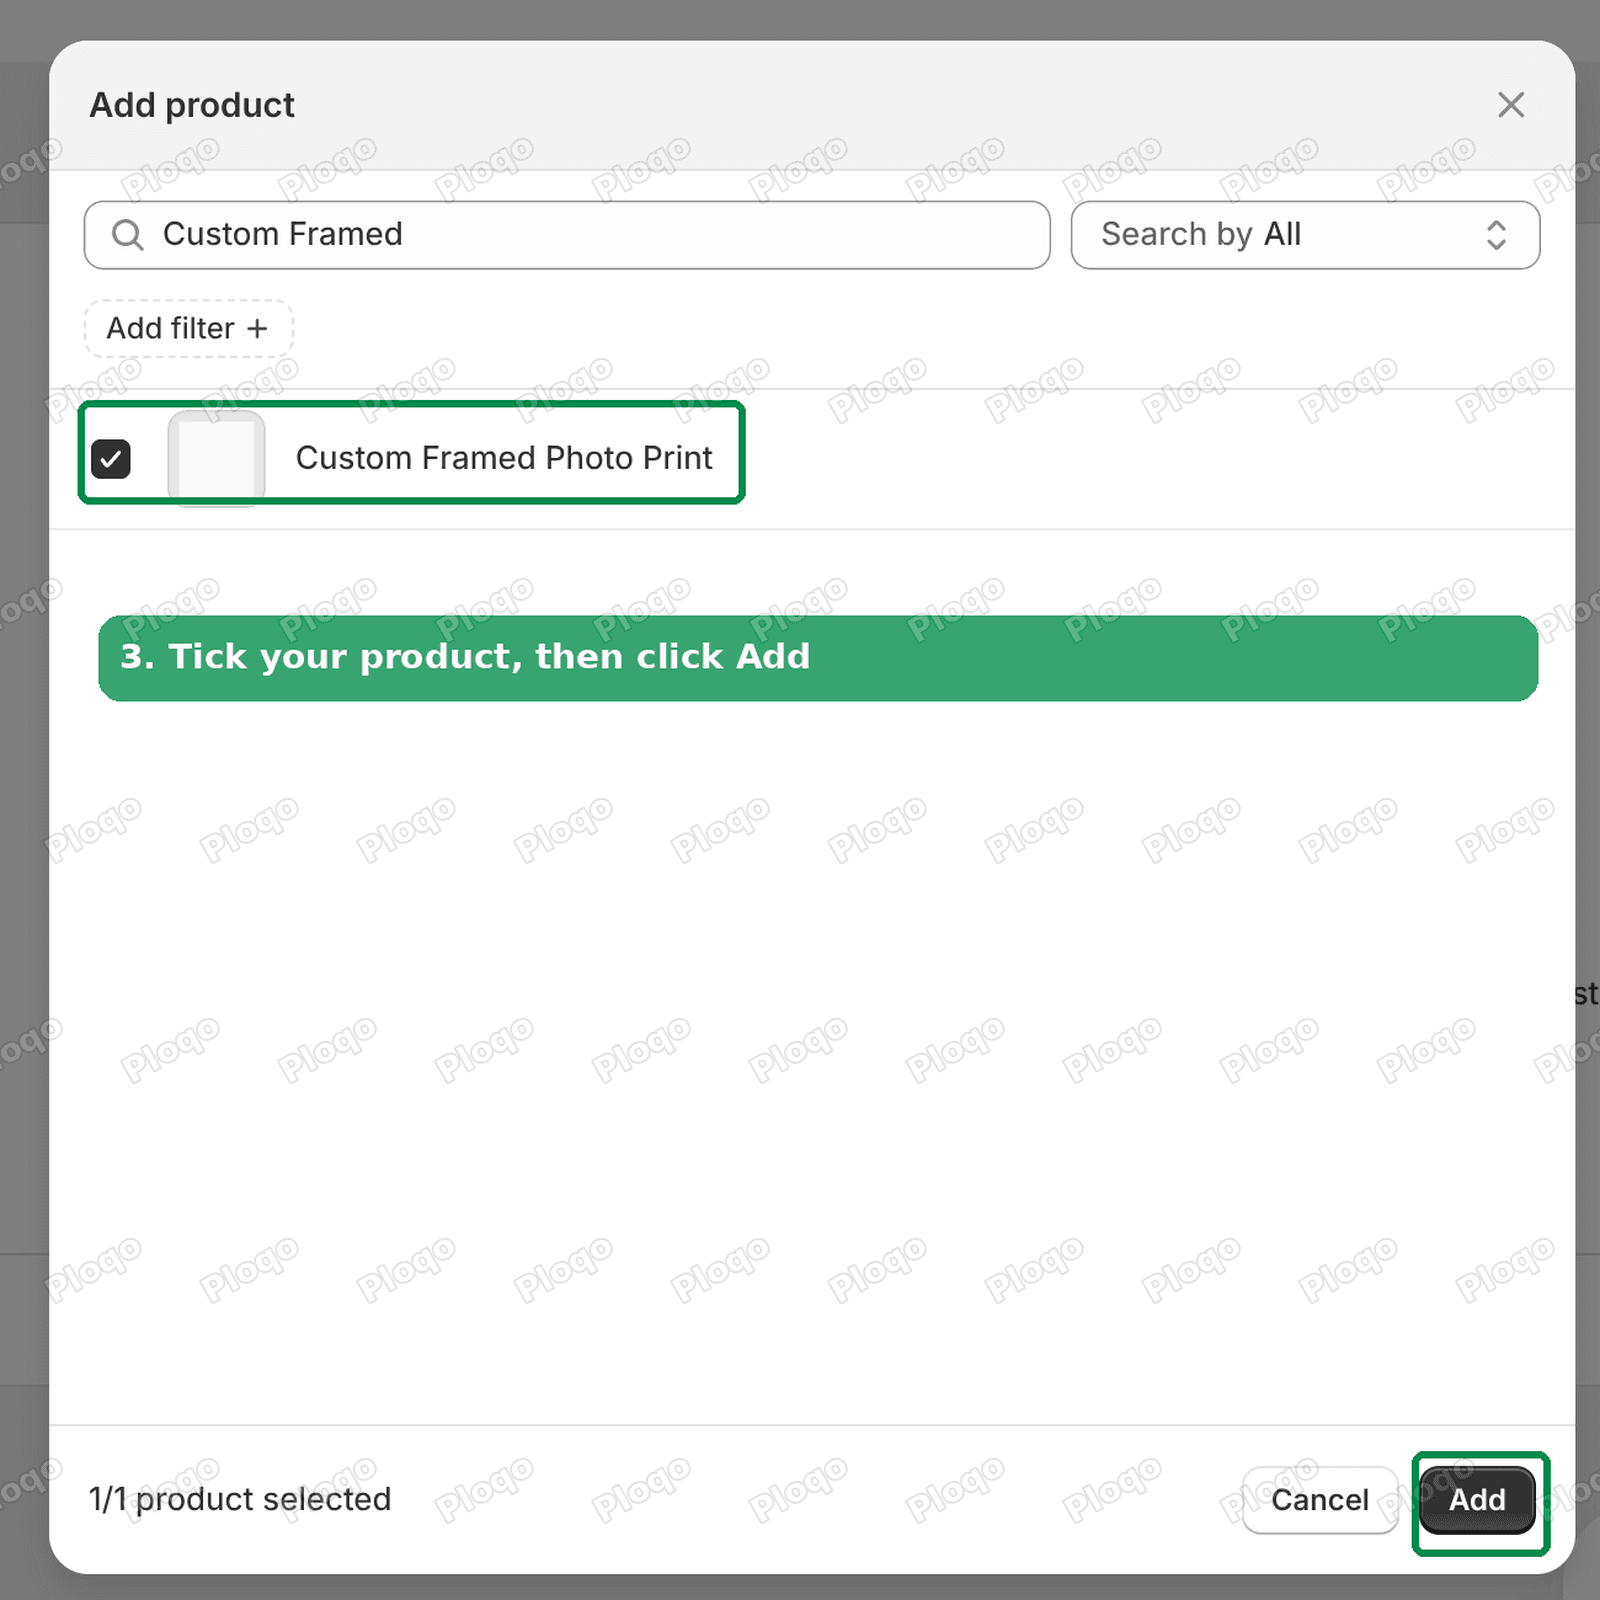 Pick the product and click Add
- Set View background to Uploaded Image and upload the plain product photo you prepared.
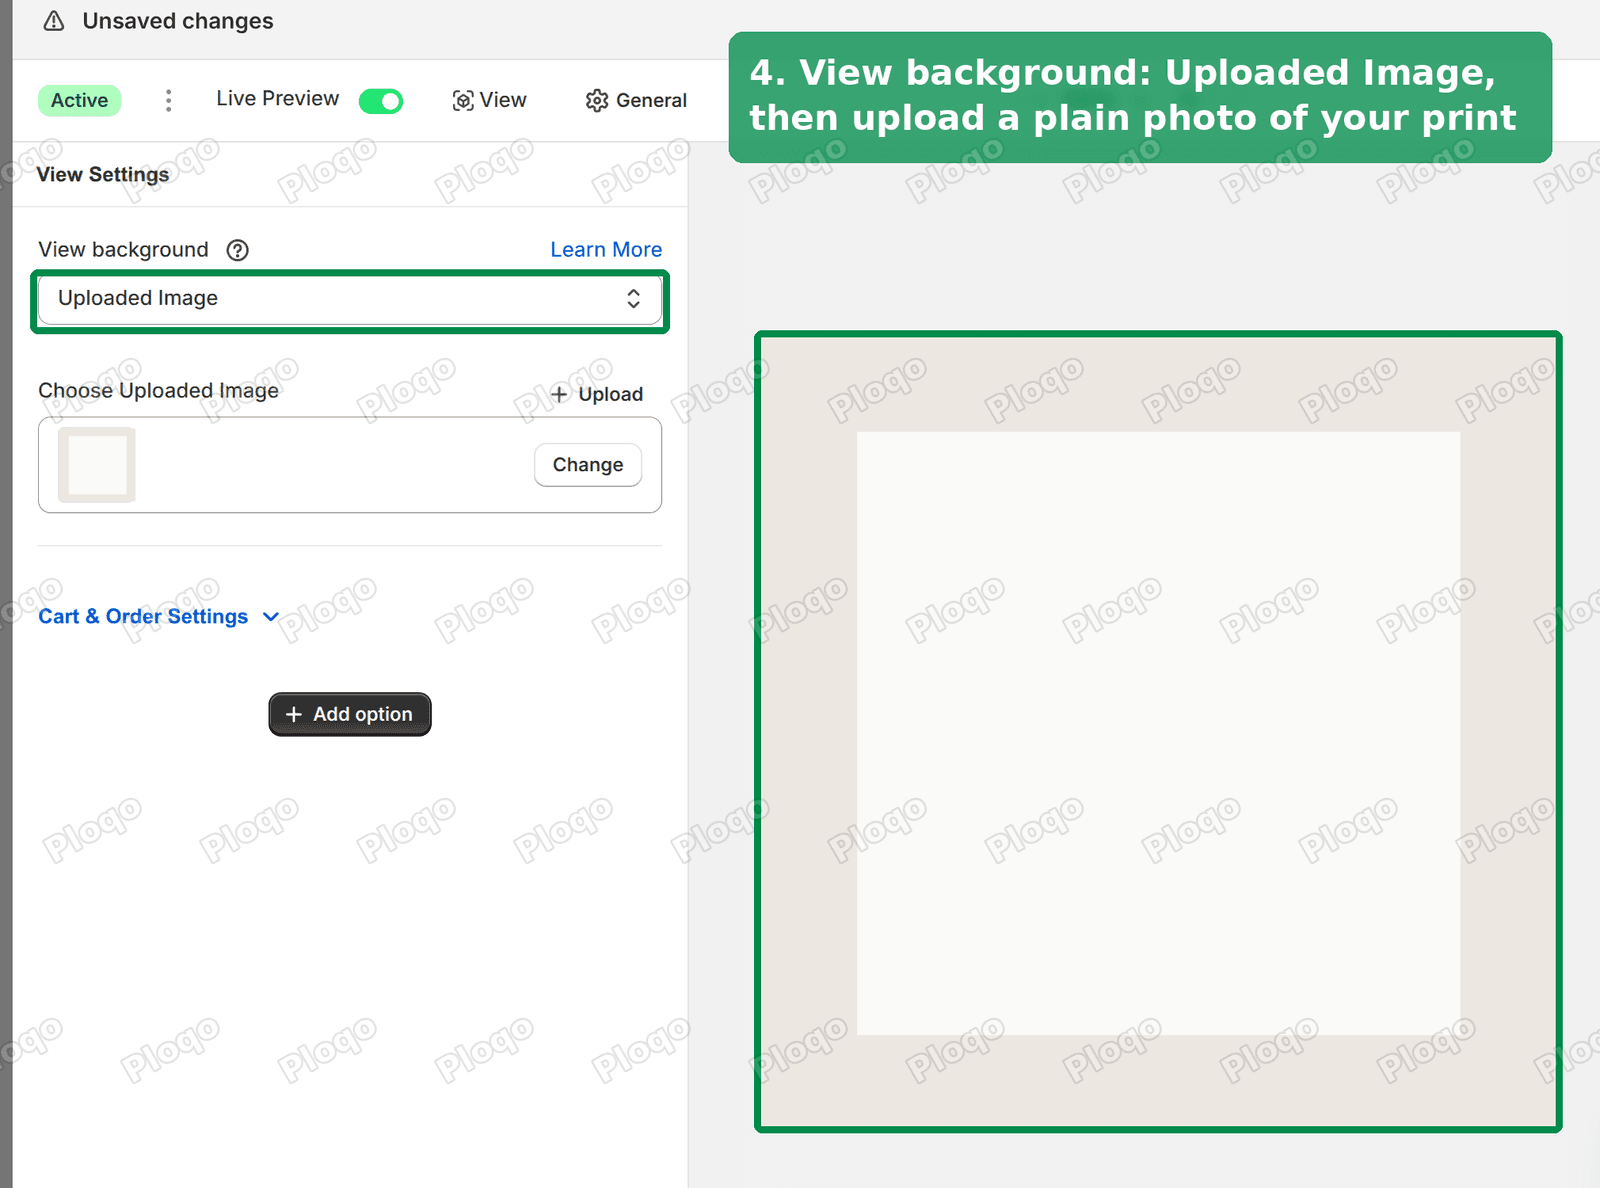 Set the view background to your plain product photo
- Click + Add option and choose Image Upload. This is the field where the customer uploads their photo.
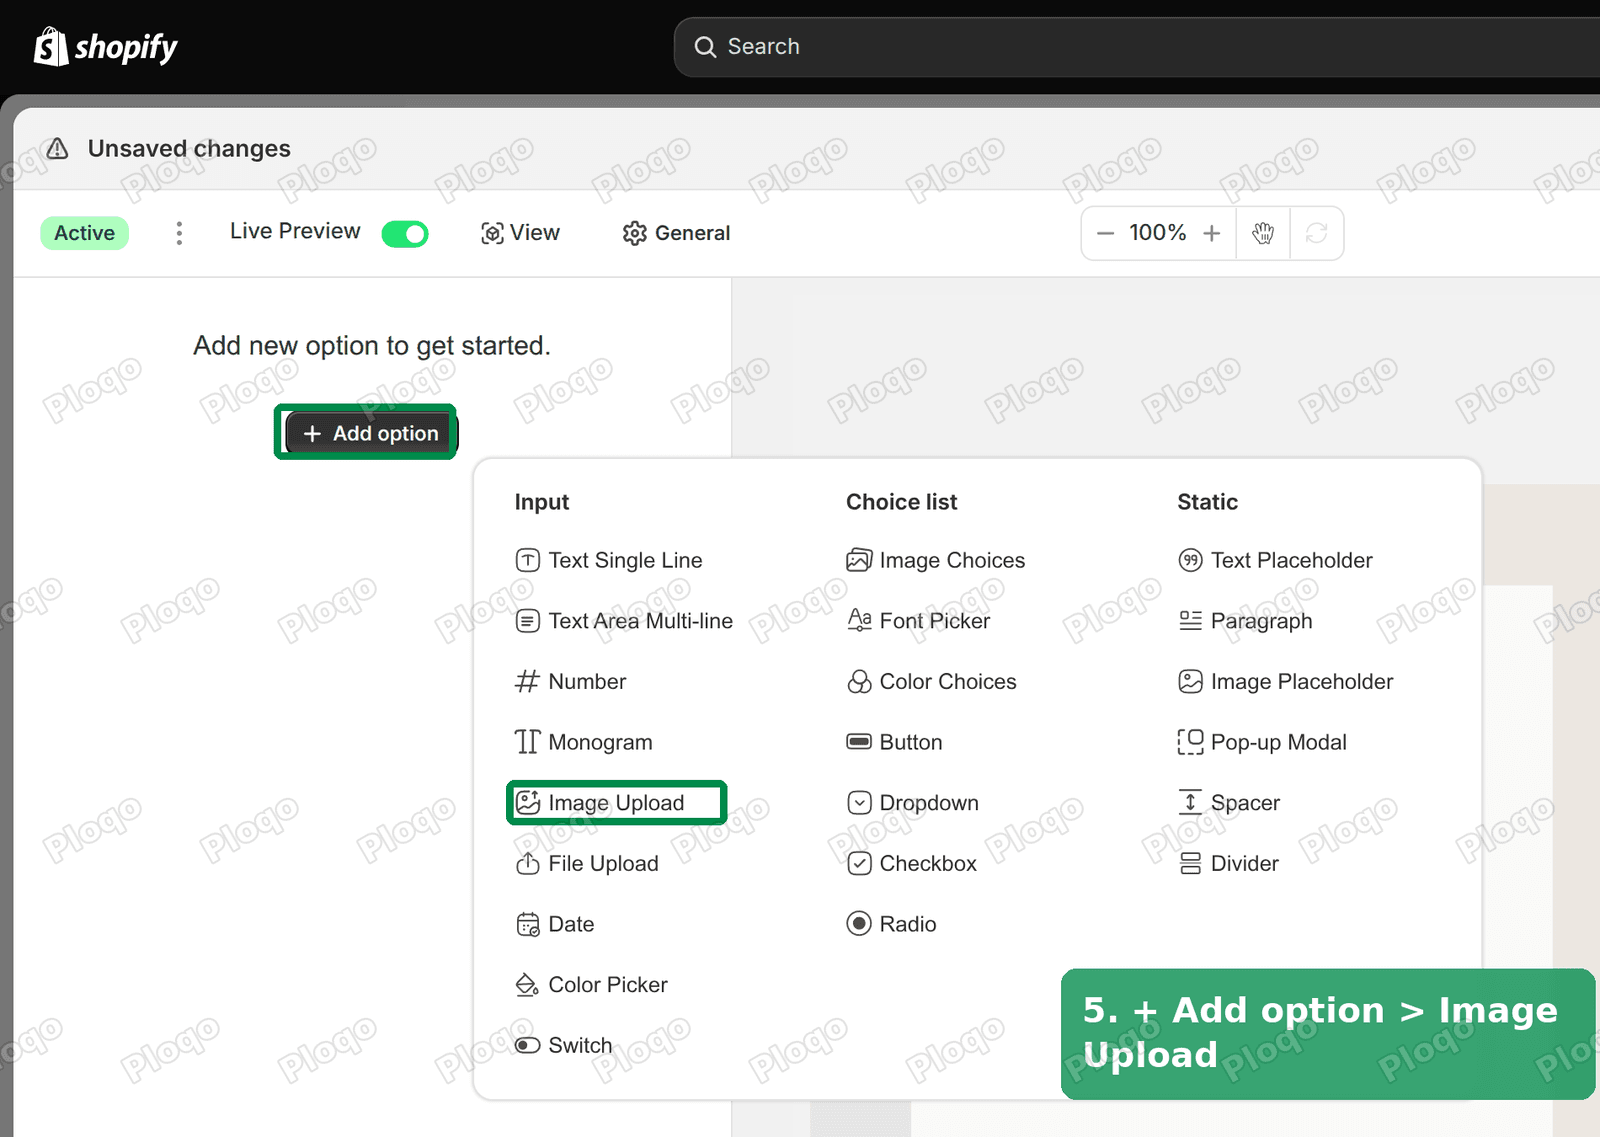 Add option menu with Image Upload highlighted
- Name it "Upload your photo". Open the Personalizer tab, set Layer to Top, then drag the box on the preview over the area where the photo should sit.
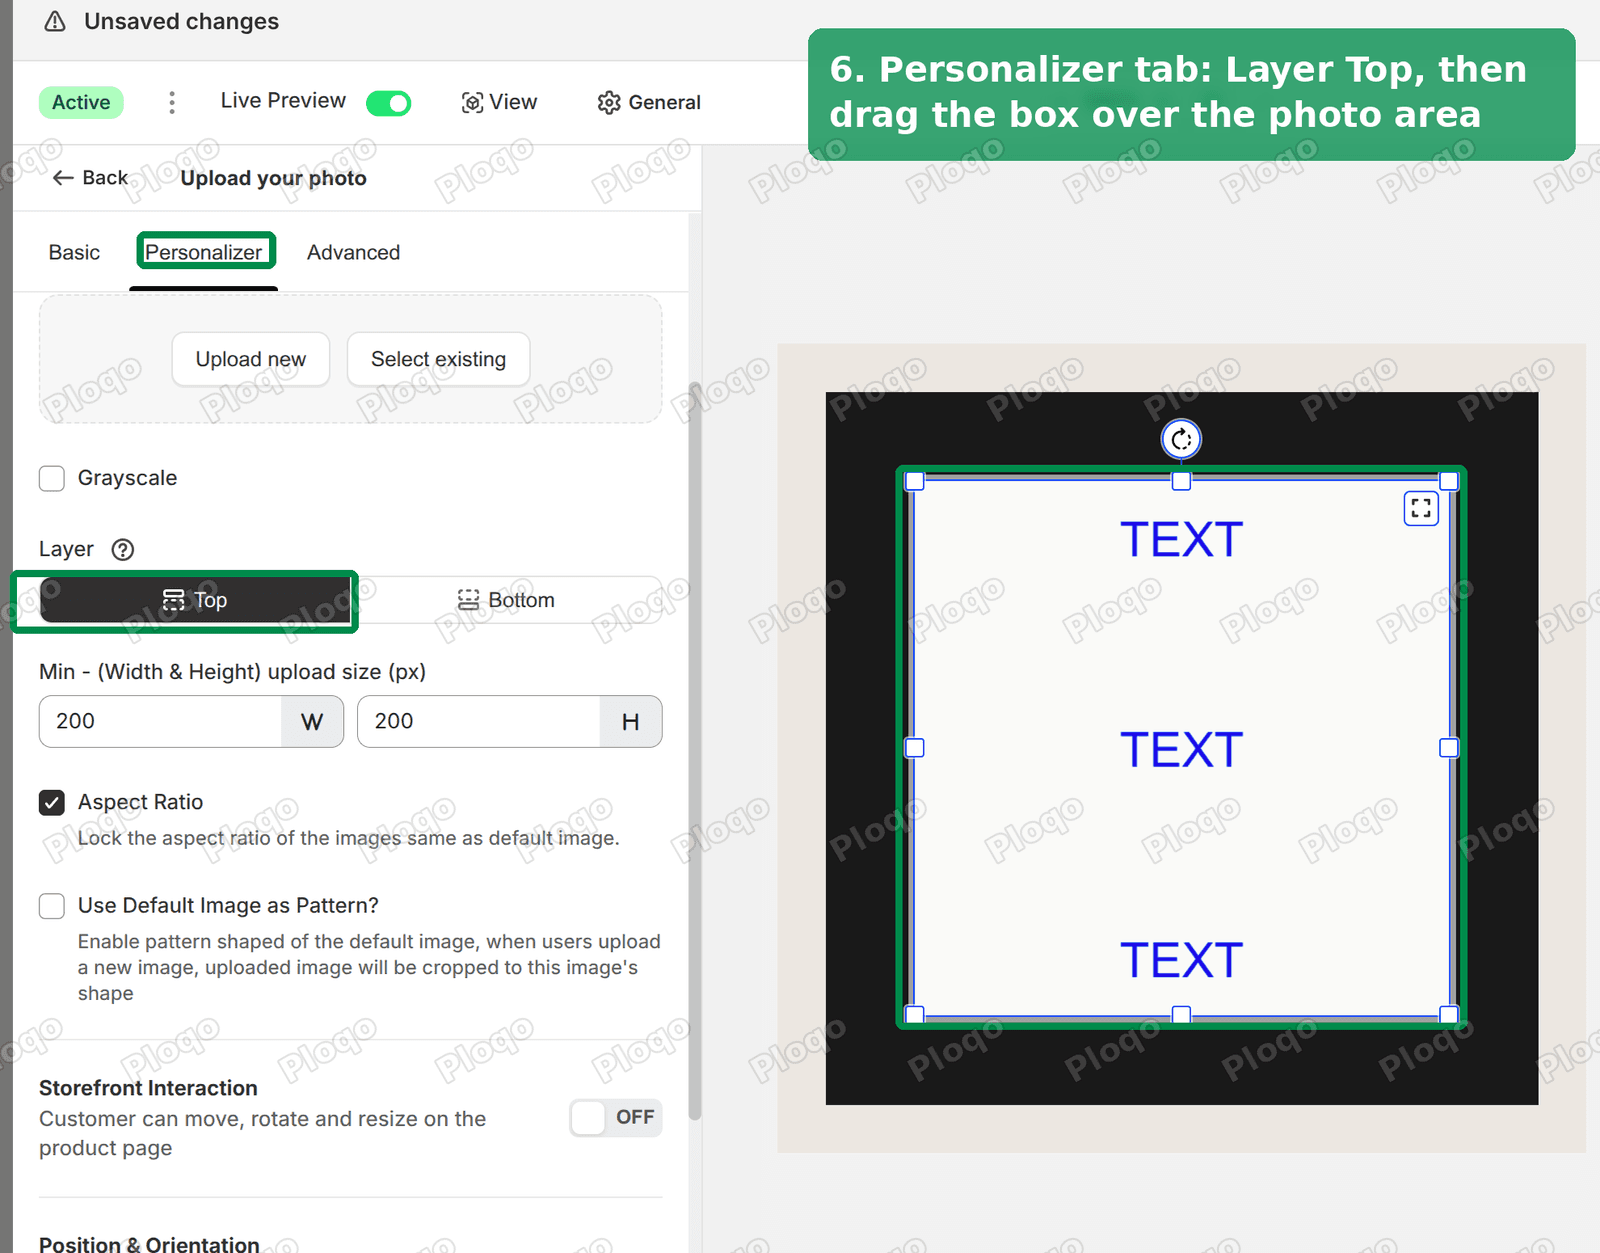 Image Upload settings with Layer set to Top
- Click + Add option and choose Image Choices. Click + Create Image Set, upload your five frame PNGs and give each one a name.
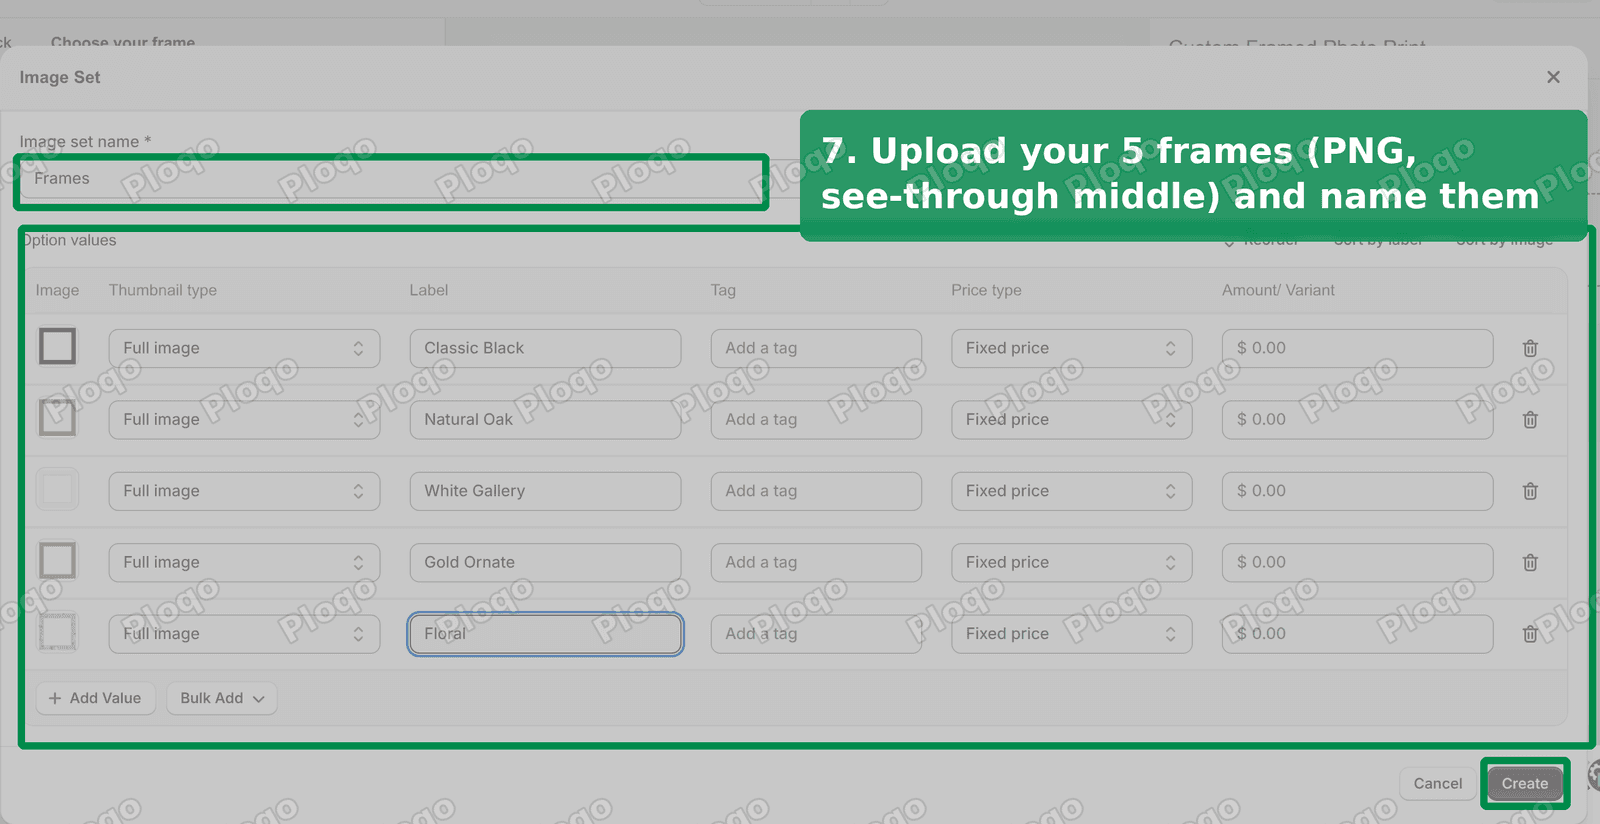 Image set with five frame designs
- On the frame option's Personalizer tab, set the position to X 0, Y 0, W 100, H 100. The numbers are percentages of the preview, so this makes the frame cover all of it.
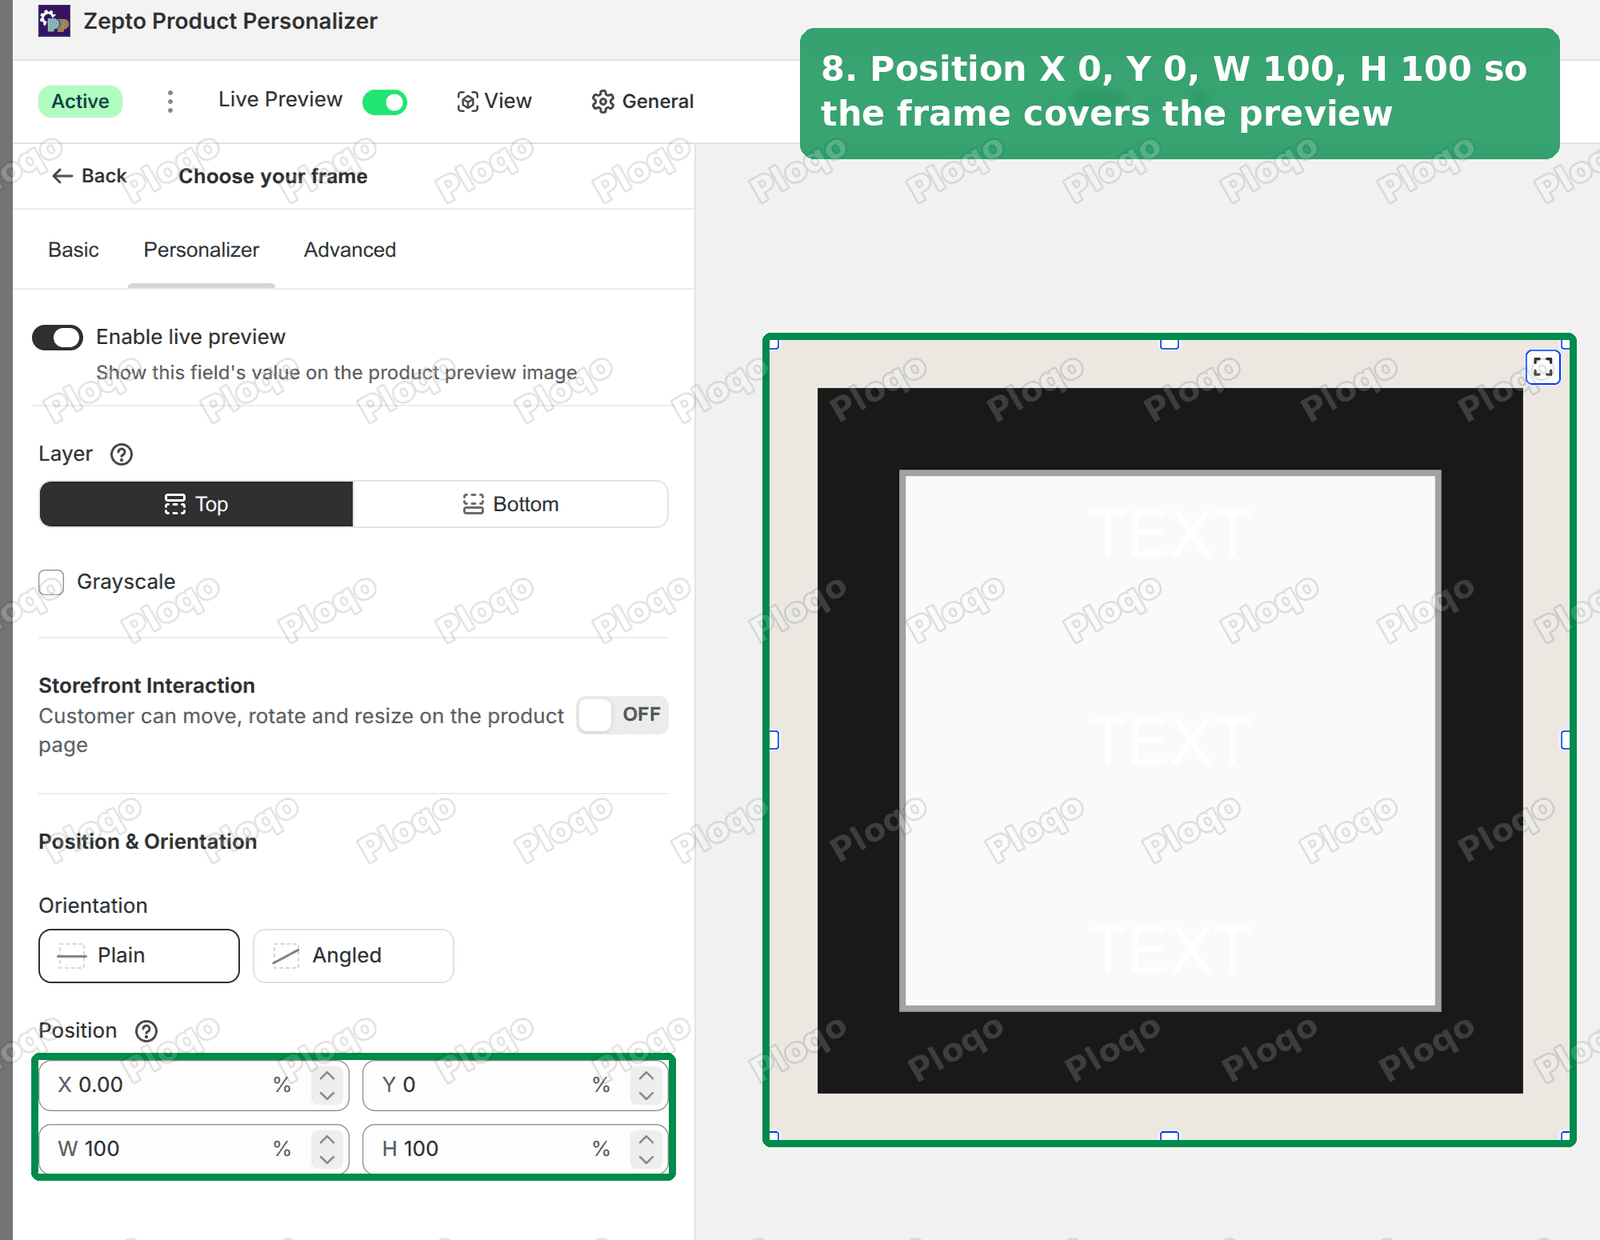 Frame position set to cover the whole preview
- Click + Add option and choose Text Single Line. Do this three times, for the top, middle and bottom text. On each one, pick the font, size and colour, then drag its box into place.
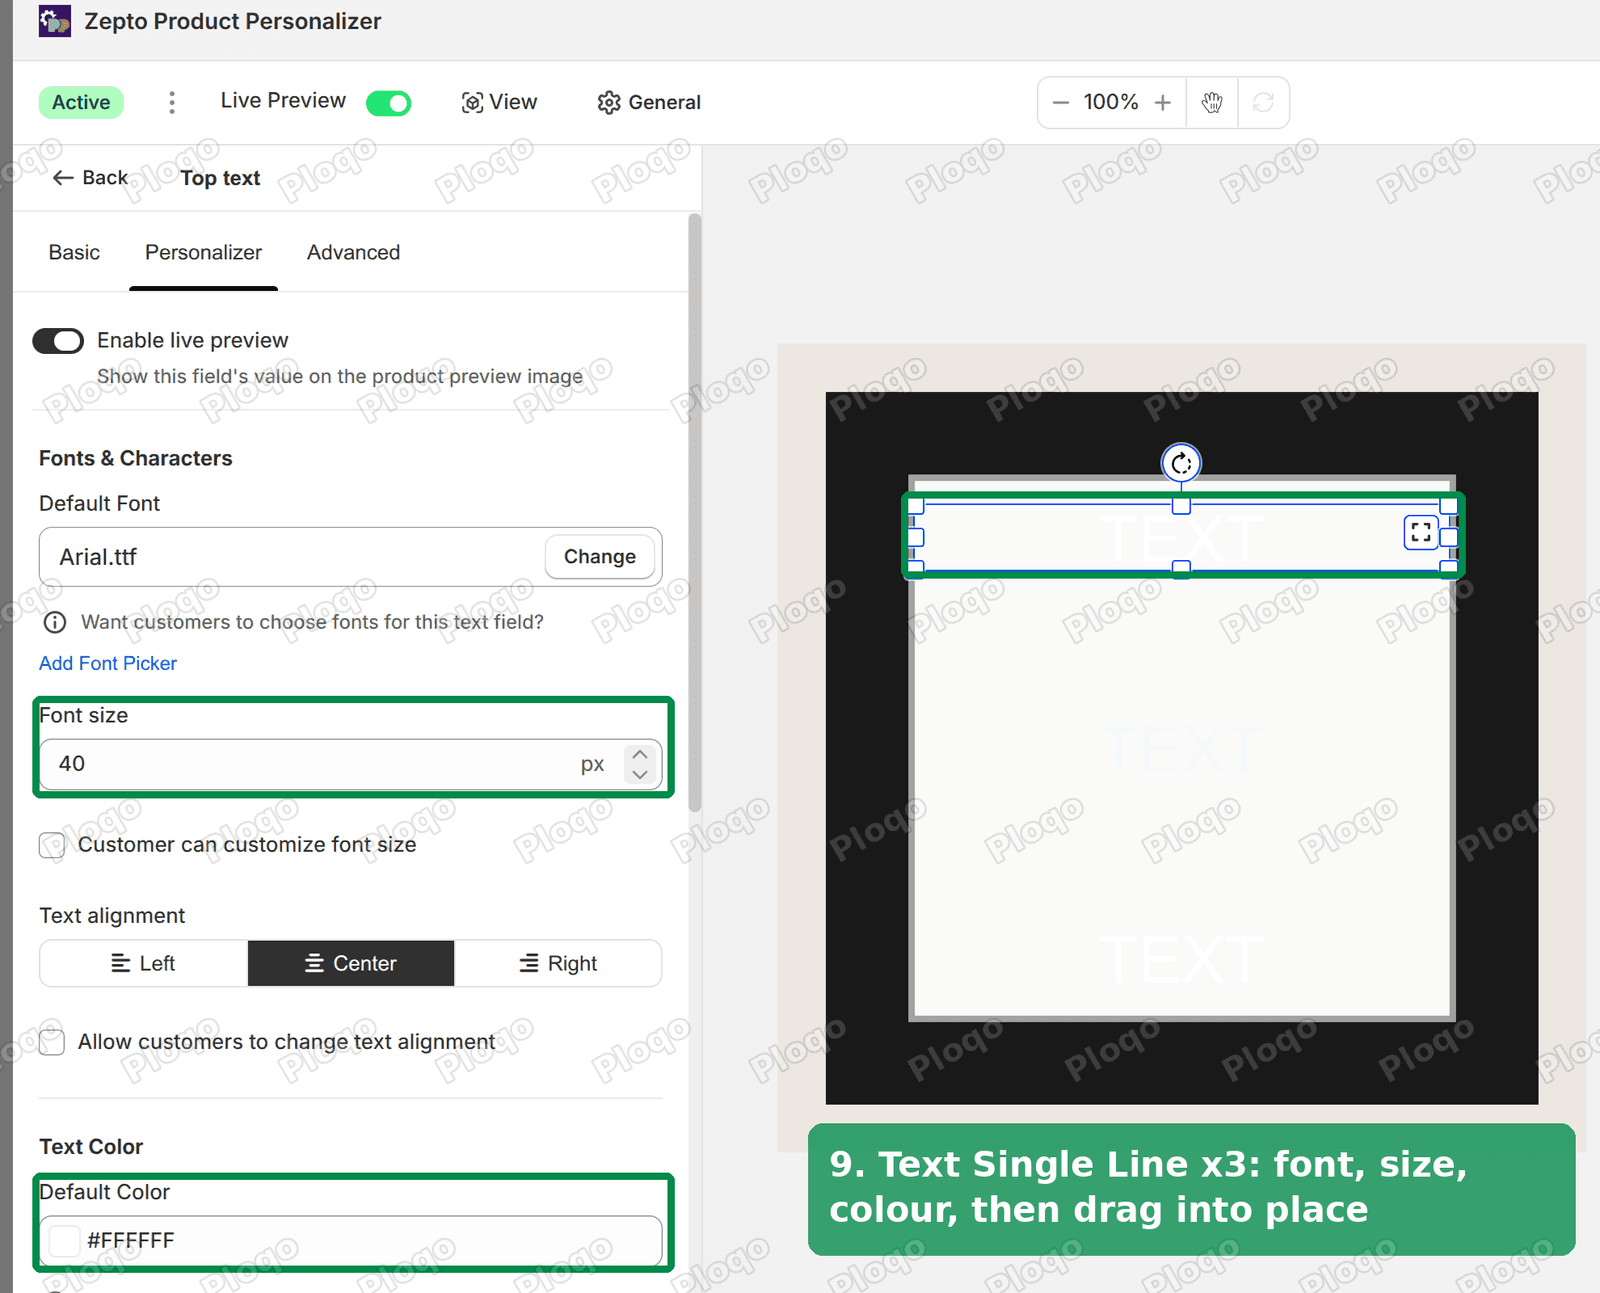 Text field settings with font size and colour
- Click + Add option and choose Checkbox. Label it "I have checked my preview and approve it" and keep Required ticked.
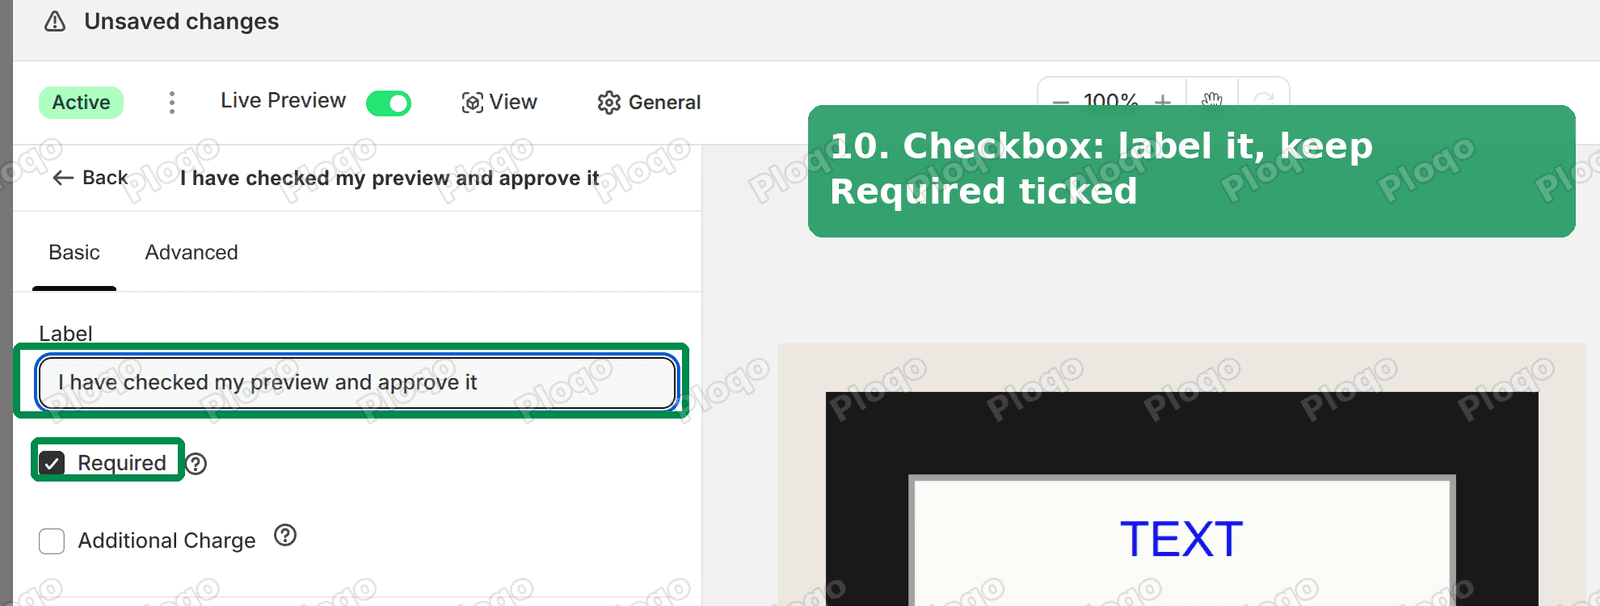 Required approval checkbox
- Click Save.
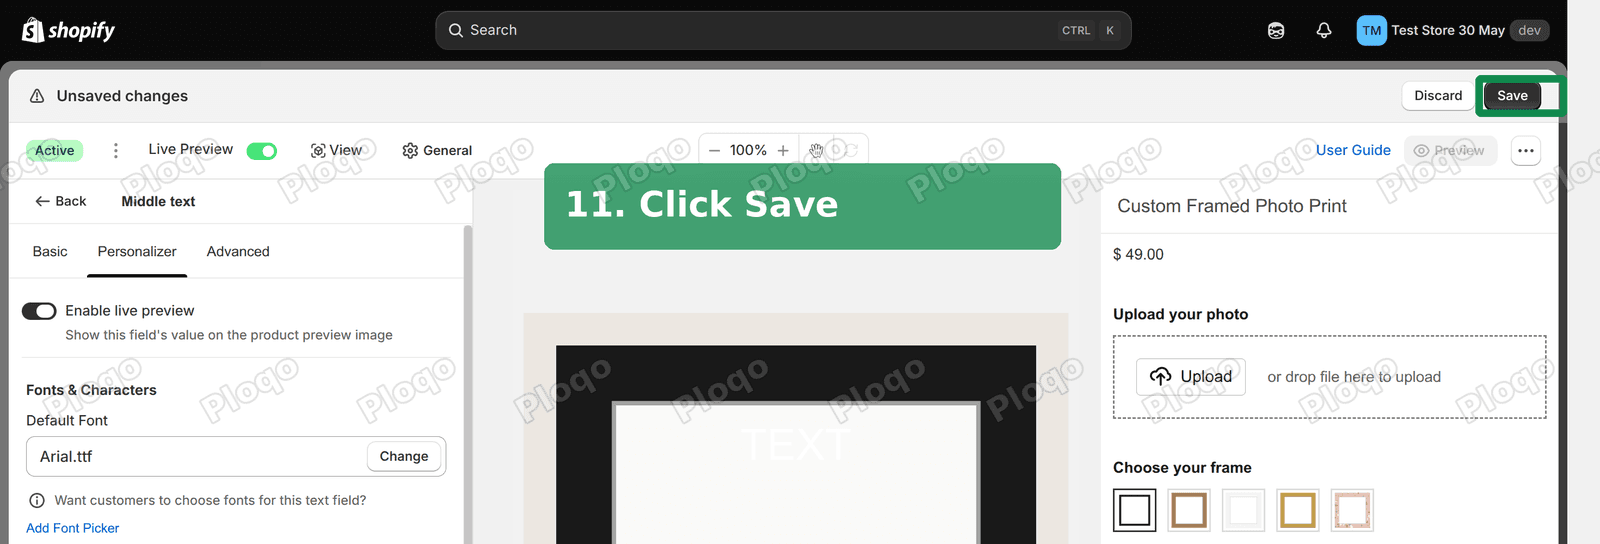 Save the option set
- Go to Online Store > Themes > Customize, open App embeds in the left sidebar, turn on Product Personalizer and click Save. An app embed is a piece an installed app adds to your theme, and nothing shows on the storefront until it is on.
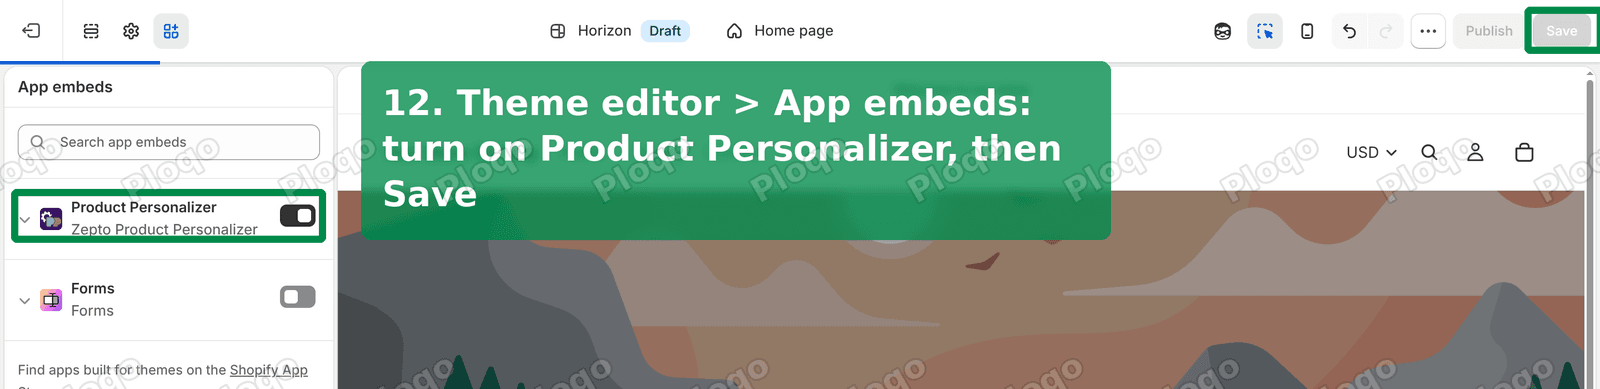 Theme editor App embeds with Product Personalizer turned on
On my test store the fields appeared under the price as soon as the embed was on. There was no need to add a block to the product page by hand.
Getting the layers in the right order
The first time I tested it, the frame and text showed up but the customer's photo did not. The upload worked and the file name appeared under the field, yet the preview stayed white where the photo should be.
The cause was the Layer setting on the photo field. I had set it to Bottom, which puts the photo underneath the background image. My background was a solid photo of a blank print, so it covered the customer's photo completely. Switching the photo to Top fixed it straight away.
Two rules keep the stack right:
- Everything the customer adds goes on Top. The photo, the frame and the text all sit above the background.
- Order the options in the list the way you want them stacked. I kept the photo first, the frame second and the three texts after that. The frame drew over the edges of the photo and the text drew over both.
Bottom is for a different setup, where the background is a product mock-up with a see-through window, such as a phone case, and the customer's design should show through from behind.
Letting customers approve the preview
The merchant in the thread wanted customers to approve the design before purchase. There is no separate approval screen in Zepto, but a required checkbox does the same job on the product page. The customer sees the preview, ticks "I have checked my preview and approve it", and then adds to cart.
If you want a stricter proof step, where you send a proof after the order and wait for a reply, that is a separate workflow. Ask the app's support whether they offer it before you pick one.
What it costs
The Zepto listing says "Free, from 9.99 every 30 days with a 15-day free trial, before it would open. There was no free plan to pick on that screen. Check the plan page when you install so the charge does not surprise you.
Best product customizer apps for Shopify
If Zepto does not fit, these are the other personalizer apps with the most reviews in this category. Figures are from the Shopify App Store listings at the time of writing.
- Zepto Product Personalizer: 1,297 reviews, 4.9 stars, from $9.99/month. Photo upload, image choices, text, live preview.
- Teeinblue Product Personalizer: 337 reviews, 4.9 stars, free plan and $49/month. Aimed at print-on-demand shops.
- Customily Product Personalizer: 241 reviews, 4.8 stars, free plan and $49/month. Live previews and print-ready files.
- Inkybay - Product Personalizer: 159 reviews, 4.5 stars, from $19.99/month. Full design tool with custom sizes and pricing.
- Kickflip product configurators: 135 reviews, 4.6 stars, from $49/month. A full product builder, more than a photo frame needs.
The one-star reviews across these apps repeat two themes: preview bugs, such as a blurry or wrongly sized preview, and slow support. Before you commit, test the preview with a large phone photo and a long line of text, since those are the cases customers hit first.
Can you do this without an app?
Not with Shopify's own settings. A theme can add a text box or a file upload to the product page, but drawing the photo, frame and text together as a live preview needs custom code in the theme. A developer would build a drawing area on the product page and save the customer's choices with the cart.
That is worth paying for when the preview has to match the finished product exactly, for example exact frame proportions and fonts, or when you need a print-ready file created for every order. For most shops an app gets you live in an afternoon.
If the preview does not show
- No fields on the product page? Check that the app embed is turned on in the theme you are actually using, and that you clicked Save in the theme editor.
- Frame shows, photo does not? Set the photo field's Layer to Top.
- Photo is hidden behind a white square? The frame PNG has a white middle instead of a see-through one. Re-export it with transparency.
- Text is in the wrong place? Drag the text box on the preview in the app, or type the position numbers. They are percentages of the preview, not pixels.
- Changes do not appear? Click Save in the app, then reload the product page.
Product customizer vs product options: which do you need?
Pick a product options app if customers only need to tell you something, such as an engraving line or a gift note, and they do not need to see it on the product. These apps are cheaper and simpler.
Pick a product customizer when the customer needs to see the result before buying, which is almost always the case for photos, frames and anything with a layout. Seeing the preview is what stops "that is not what I meant" emails after the order.
I tested this on a Horizon test store with the Zepto app. The question came from this Shopify Community thread.
Spending too long on manual Shopify busywork?
PinFlow turns your Shopify catalog into Pinterest pins and posts them on a schedule, automatically. Set it up once and let it run.
Get PinFlow on the Shopify App StoreMore Shopify fixes
More community-sourced Shopify guides, tested on a live store.
Themes & Storefront
Shopify AI Section: Fix a Price Badge Hidden Behind the Image
You built a section with Shopify's AI section generator, but the price badge on each card sits behind the photo. Here is the Custom Liquid fix that brings it to the front without regenerating anything. Tested on a Dawn store.
Themes & Storefront
Hide Shipping Calculated at Checkout on One Shopify Product
The line under Add to cart that says shipping is calculated at checkout shows on every product, gift cards included. Here is how to hide it on one product only, with the code, screenshots and the Eclipse theme steps.
Themes & Storefront
Shopify Dropdown Menu Behind Page Content (Z-Index Fix)
Your Shopify dropdown or mega menu opens, but the page title and products sit on top of its links and the menu closes before you can click. The fix is one Custom CSS rule in Theme settings. Tested on a Rebel store.