
How to Post Fresh Pins Consistently With Only 50 Shopify Products
Pinterest rewards fresh pins, but a small catalog runs dry in weeks. Here is how to turn a few dozen products into a month of different pins, and review them before they go out.
Updated September 5, 2026 · 7 min read
Why a small catalog runs dry on Pinterest
Pinterest rewards fresh pins. A pin you have never posted before gets shown to more people than the same image pinned again, which is why accounts that post something new most days keep growing and accounts that repost the same handful of images stall.
That is awkward if you sell 50 to 100 products. Pin each product once and you have 50 to 100 pins, which at four or five a day is gone in under three weeks. Most merchants hit that wall a month or two in, decide Pinterest "stopped working", and quietly stop posting.
The way out is not more products. It is more distinct pins per product. One product photo, laid out in a different template with a different colour palette and different text, is a different pin as far as Pinterest is concerned. Fifty products across a handful of templates and palettes becomes several hundred pins, which is months of daily posting from a catalog you already have.
PinFlow does that generation for you. This guide covers what happens next: how to review what it made, adjust anything you want to change, and approve it so it publishes on schedule.
Important
Nothing PinFlow generates reaches Pinterest on its own. Every pin waits in a review queue until you approve it, so you always see a pin before it is public.
Step 1: Open the review queue
Open Calendar in PinFlow. Pins are grouped into four tabs.
Needs Approval is where every newly generated pin lands. Scheduled holds the ones you have approved and are waiting on their slot. All is everything, and Rejected is what you skipped.
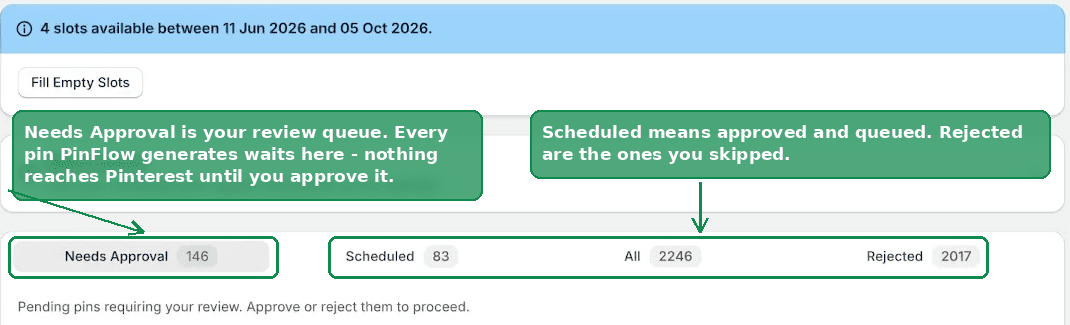 The All Pins tabs in PinFlow, with Needs Approval highlighted as the review queue
If you see a banner saying you have empty slots between two dates, Fill Empty Slots generates pins to cover them.
Step 2: Read a day at a time
Pins are grouped by the day they are due to post, with a count next to each date.
Each pin shows the board it will post to and the exact time it goes out, both chosen for you. You can change either from this screen without opening anything. The green and red buttons on the day's header approve or reject that whole day in one click.
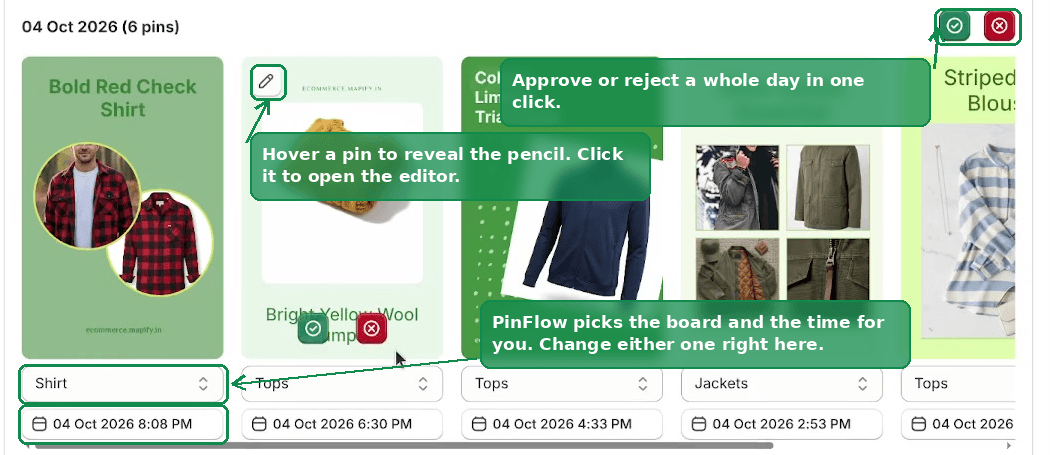 A day of pending pins showing the board dropdown, scheduled time, hover pencil, and per-day approve and reject buttons
Tip
Skim by day rather than by pin. If a day's six pins all look right, approve the whole day and move on. Only open the individual pins that look off.
Step 3: Check the words
Hover a pin and click the pencil to open it. The Pin Details side holds everything Pinterest will read.
- Image Text is the headline drawn onto the pin itself.
- Pinterest Title and Description are what appear under the pin.
- Alt Text describes the image for Pinterest and for screen readers.
- Outbound URL is the product page on your store that the pin links to.
- Board to Pin is which of your boards it posts to.
All of it is written for you from the product, and all of it is editable. Click any box and type.
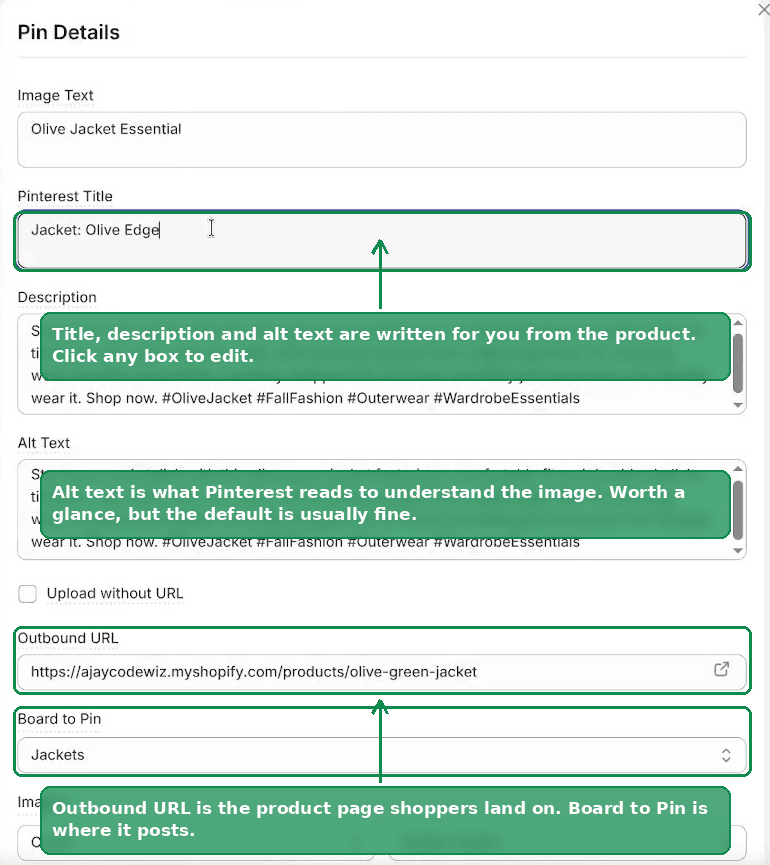 The Pin Details panel with title, description, alt text, outbound URL and board fields
If you have a particular angle in mind for a product, the title is the quickest field to adjust before approving. Otherwise leave it as generated and move on.
Step 4: Change the look
This is where a small catalog turns into a lot of pins. The same product, restyled, is a fresh pin.
- Selected Palettes are pulled from the colours in your own product photo, so a recolour still looks like your brand. Pick a different one and the whole pin re-renders.
- Fonts has three slots: main, secondary and accent.
- Templates are grouped into Basic, Minimalist, Multi-image and More styles.
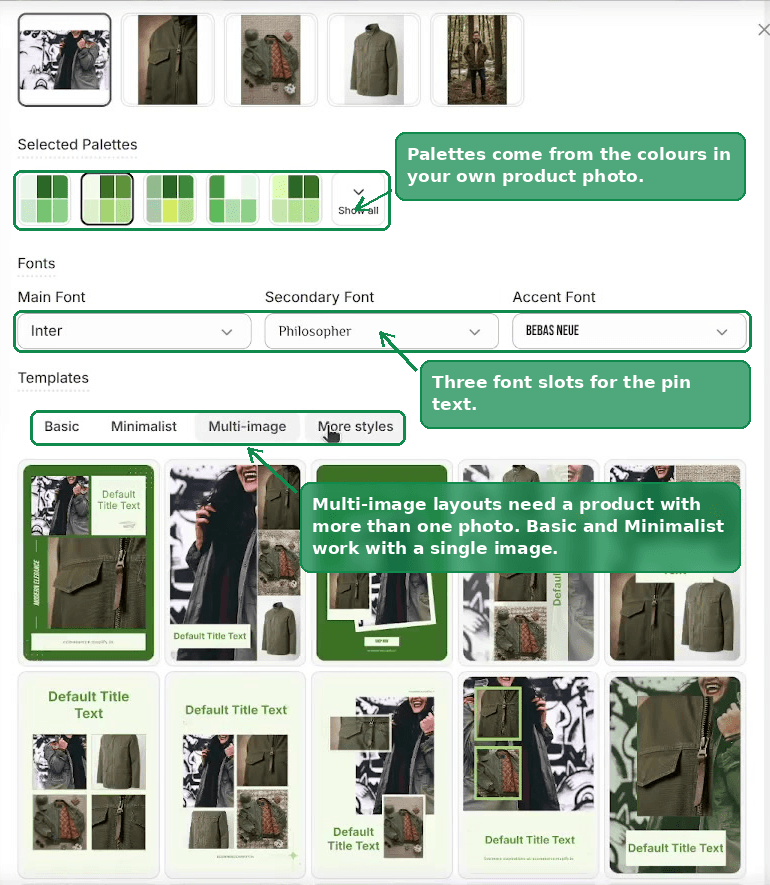 The pin editor showing colour palettes, font slots and the template picker
Multi-image templates lay several photos of the same product into one pin, so they need a product with more than one image. If a product only has a single photo, stay on Basic or Minimalist.
You can also swap which product photo the pin uses. If a jacket is unisex and the current pin shows a woman wearing it, switching to the photo of a man gives you a genuinely different pin from the same listing.
Step 5: Set when it goes out
Scroll to Schedule in the editor. Pick a date, then one of your posting slots. The slots come from the times you set on the Scheduling page, so pins stay inside the window you chose.
Save keeps your edits and approves that pin for that slot. Reject drops it. Cancel closes without changing anything.
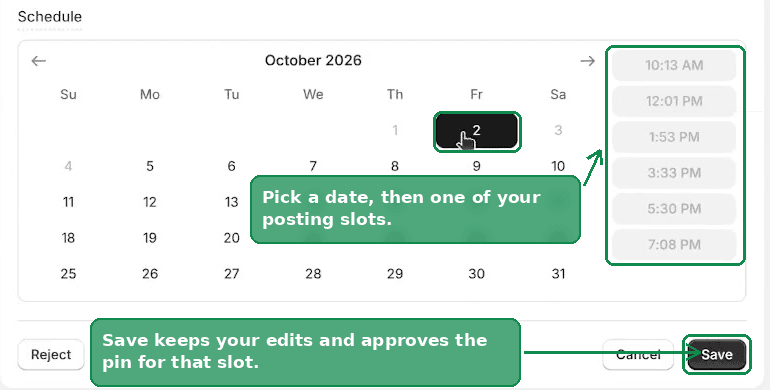 The schedule picker in the pin editor with a date, time slots, and the Save button
Step 6: Watch them publish
Approved pins move to Scheduled and post at their slot. Once a pin is live it is marked Published and stops being editable, since it now exists on Pinterest.
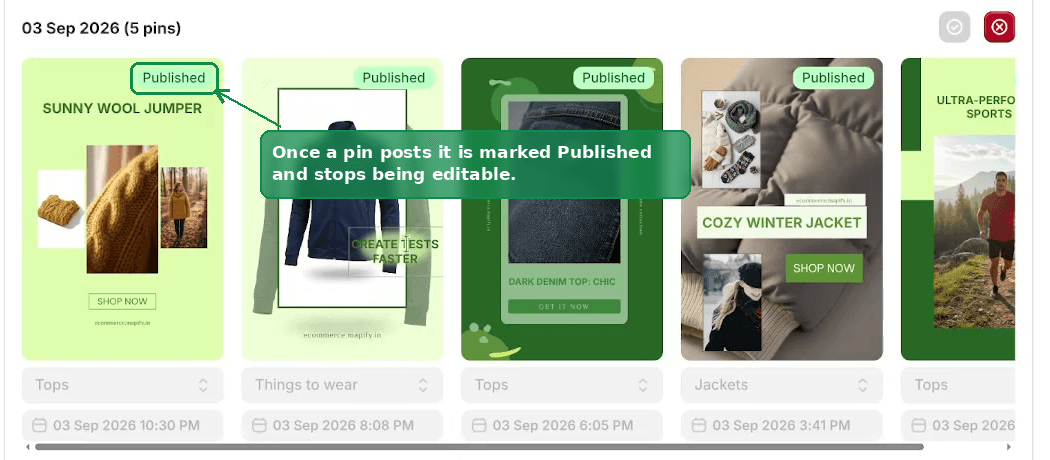 Published pins in the calendar, each marked with a Published badge
How many pins do you actually need?
Work backwards from your posting rate.
| Pins per day | One month | Three months |
|---|---|---|
| 3 | ~90 | ~270 |
| 5 | ~150 | ~450 |
| 8 | ~240 | ~720 |
At five pins a day you need roughly 150 pins to cover a month. A 35-product catalog run through several templates and palettes produces around that in a single generation, which is the whole point: you are not limited by how many products you sell.
Tip
Start at three to five pins a day rather than eight. A steady trickle looks natural, keeps your queue lasting longer, and is easier to review properly. You can always turn it up once you see which pins earn clicks.
If you are running low
Open Settings, on the Status tab. It shows how far ahead you are already covered, as Pins are currently generated until a date.
- Generate until <date> now builds a fresh batch out to that date in one go. This is the control that turns a handful of products into hundreds of pins, so it is the one to reach for when the calendar is looking thin.
- Generate next batch earlier brings the next automatic batch forward instead of waiting for the current one to run down.
Autopilot, also in Settings, does this for you on a schedule, building the next batch before the current one runs out.
If a batch comes back smaller than you expected, the products list is usually too narrow. Open Products and select more of your catalog.
Related
- Getting Started with PinFlow for first-time setup.
- Setting Up PinFlow from the Dashboard for connecting Pinterest, picking boards, and setting your schedule.
Not using PinFlow yet?
PinFlow turns your Shopify catalog into Pinterest pins and posts them on a schedule, automatically. Install it and follow this guide to get your first month of pins live.
Get PinFlow on the Shopify App StoreRelated articles
Content Calendar
How to Schedule Pinterest Pins: Review, Edit and Approve
Every pin PinFlow generates waits in the calendar. How to read the four tabs, edit a pin before it goes out, and fill the gaps in your queue.
Pin Studio
Upload Your Own Pin Image Instead of a Template
PinFlow used to stamp its own frame, text and graphics on every pin. Two new options skip that: a frameless template, and your own Canva uploads.
Pin Studio
Pinterest Pin Description Character Limit: What Actually Fits
The Pinterest pin description character limit is 500, and the title limit is 100. Mobile cuts both sooner. Here is what fits and how to make AI respect it.