
Pin Studio: Design Your Pinterest Pins
Pick the templates, colours, fonts and AI wording that every generated pin inherits, and build a single pin by hand when you want one.
Updated September 6, 2026 · 7 min read
Watch the walkthrough
Six minutes covering the whole page, including the part most people miss: Pin Studio is where you set the look, but it is not where you should be making all your pins.
What Pin Studio is actually for
Pin Studio does two jobs, and it helps to keep them separate in your head.
Its main job is setting your defaults. The templates, colour palette, fonts and AI wording you choose here are what every pin PinFlow generates in bulk will use. You are not designing one pin. You are deciding what a few hundred of them will look like.
Its second job is making one pin on demand. If you want a specific product pinned on a specific date, you can build and schedule it here directly.
The preview on the right is the point of the whole page. It shows real designs on a real product of yours, so you can see what your defaults produce before you commit to hundreds of pins in that style.
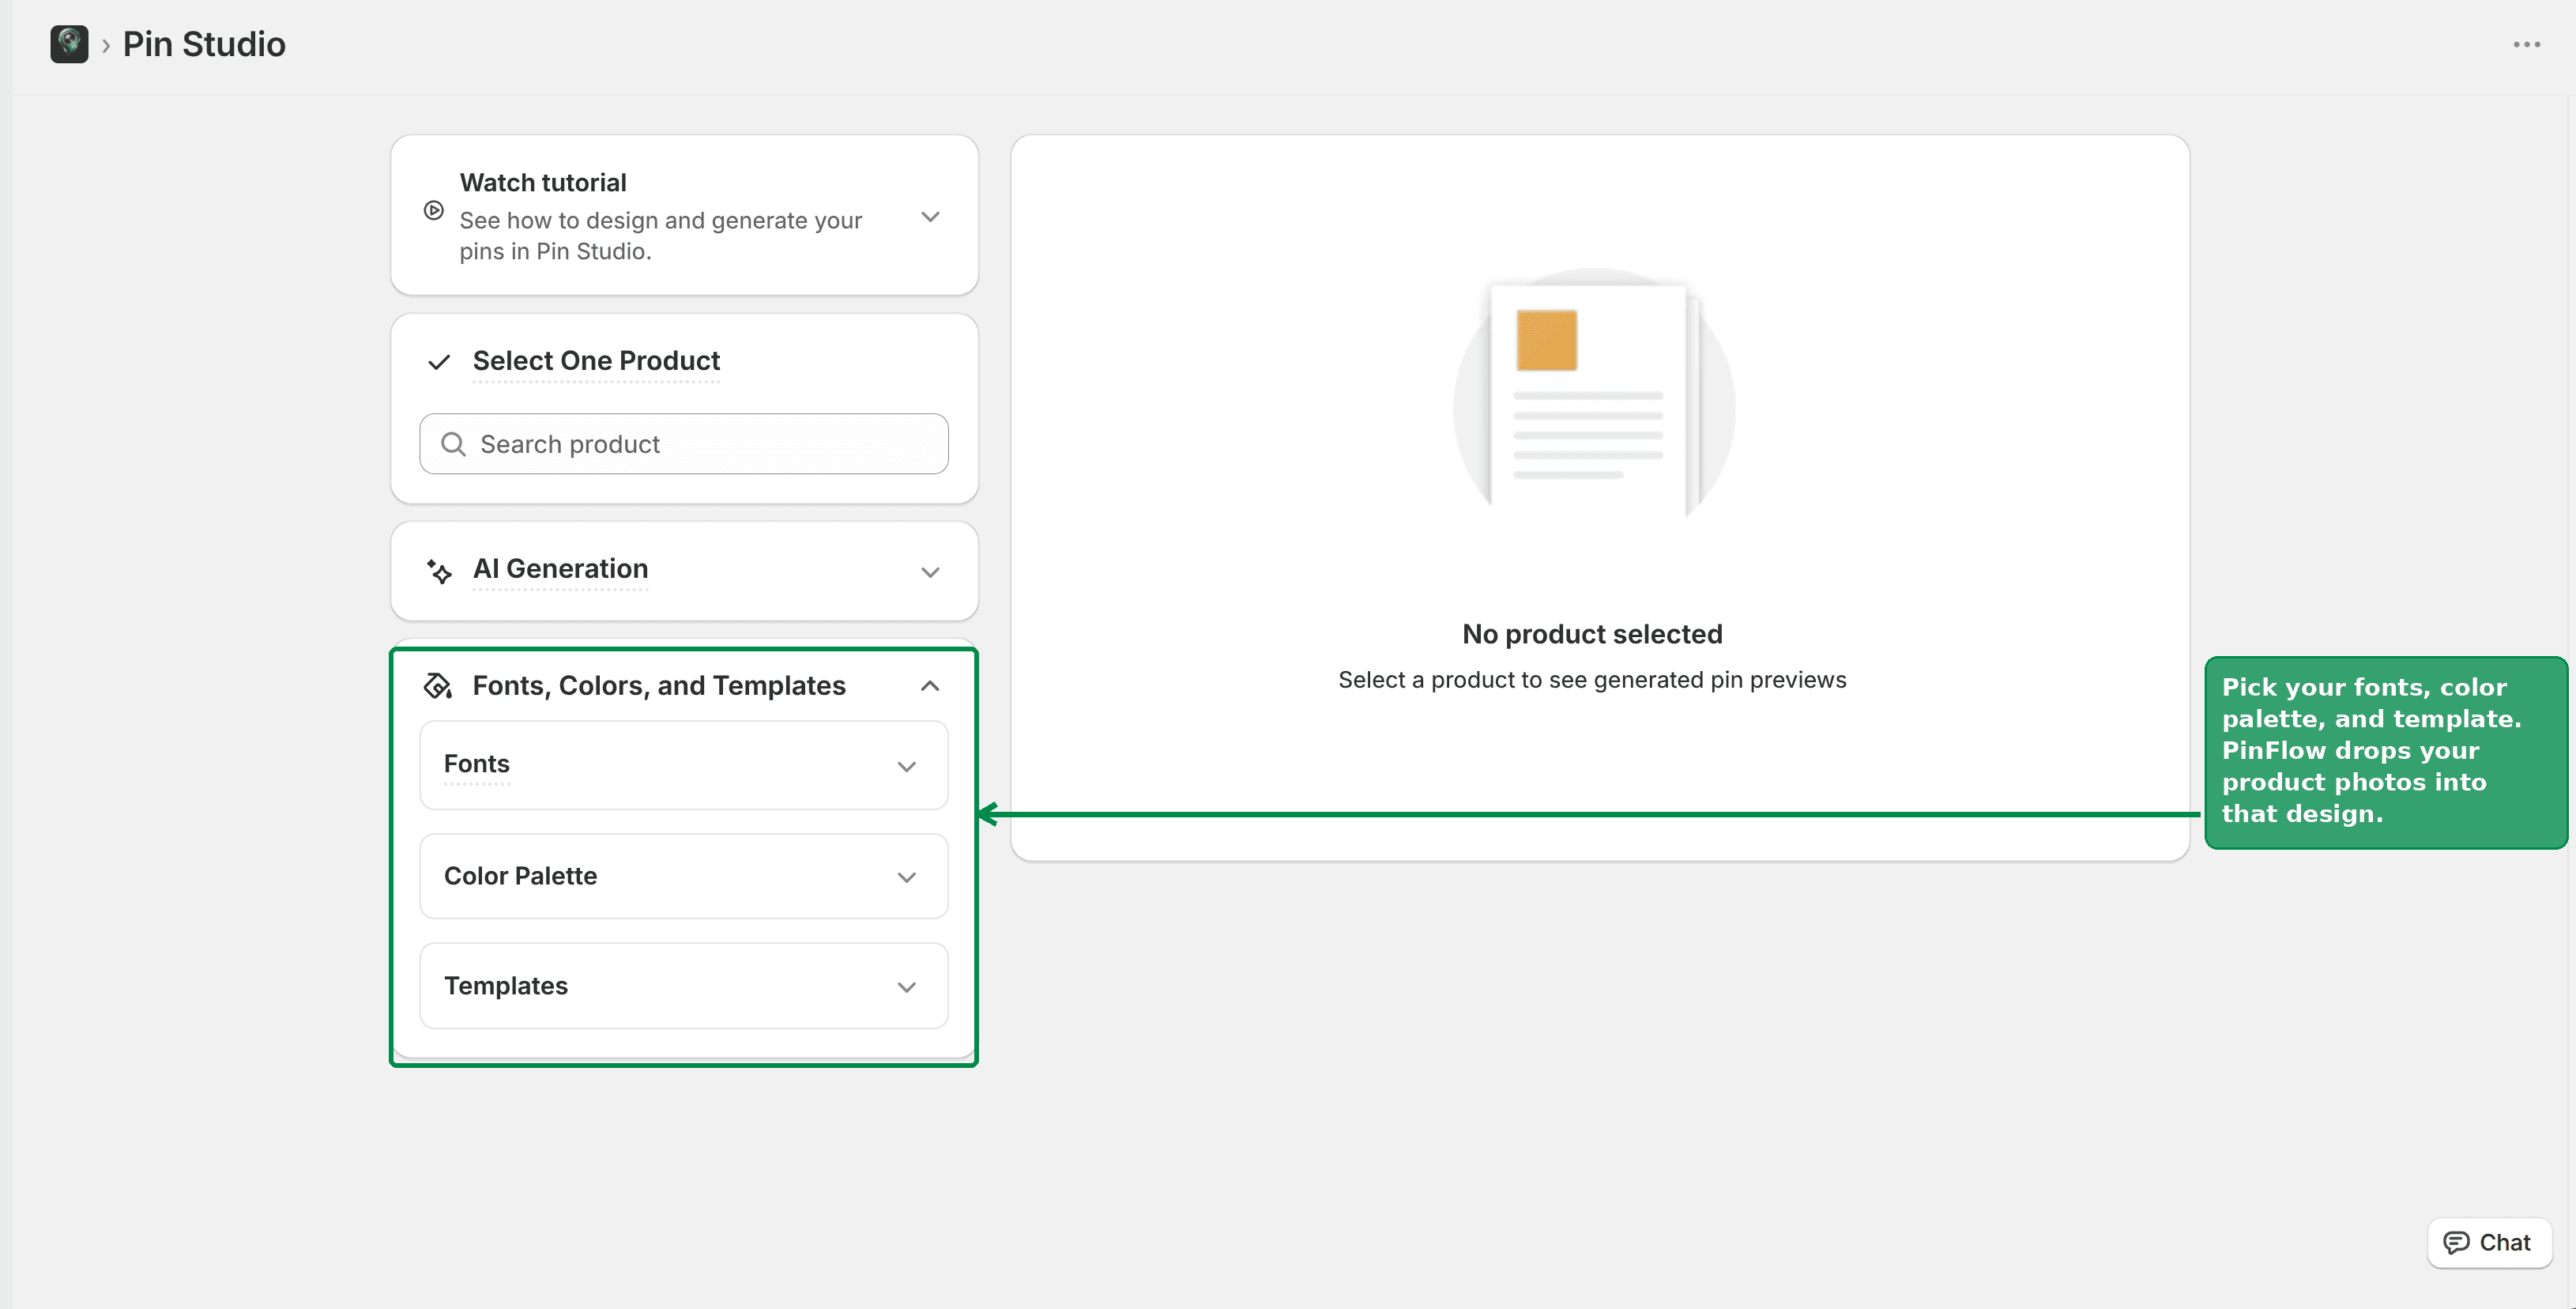 Pin Studio with the product picker, AI Generation, and Fonts, Colors and Templates in the left column, and the preview area on the right
Step 1: Choose a product to preview with
The Product picker at the top of the left column decides which product the previews are built from. Search for one and select it.
Pick something representative. A product whose photo is busy or oddly cropped is a better test than your cleanest studio shot, because it shows you which templates hold up.
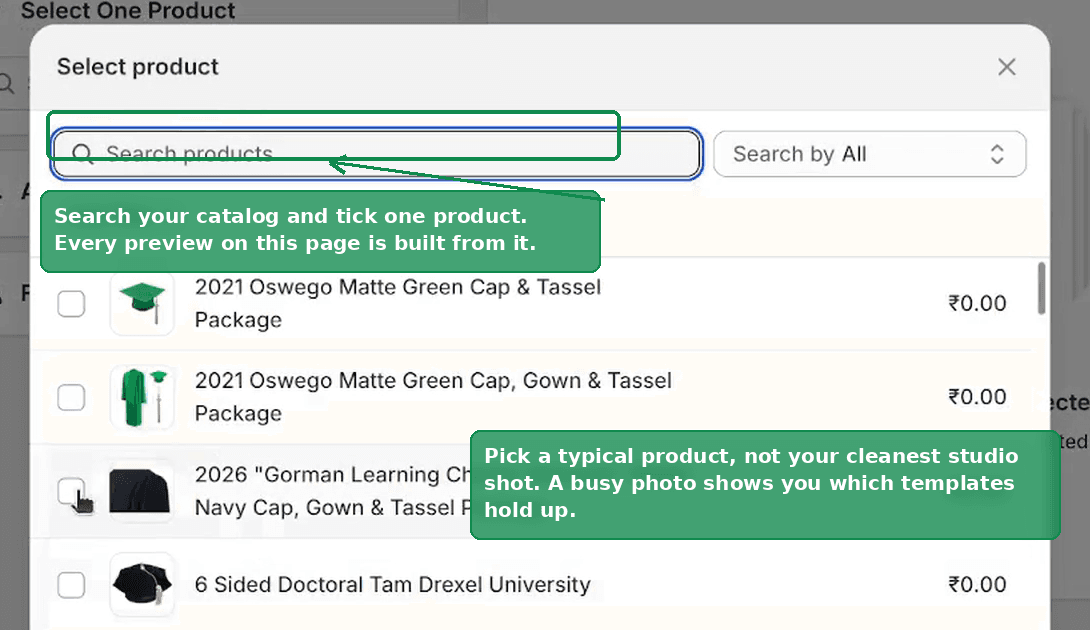 The Select product dialog in Pin Studio, with the search box highlighted and a list of products to tick
Step 2: Fonts, colours and templates
Open Fonts, Colors, and Templates. This section holds the three settings that decide how a pin looks.
Fonts. Choose the typeface used for the text drawn on the pin. The defaults were picked to be readable at the size Pinterest actually shows a pin, so if you have no strong brand font, leave them alone.
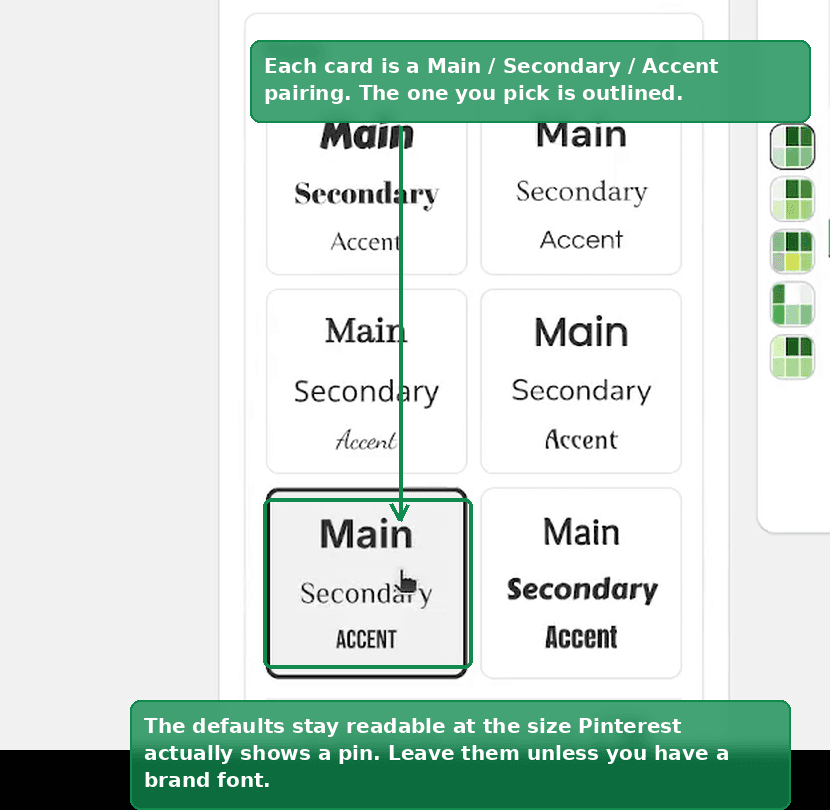 The Fonts picker showing Main, Secondary and Accent typeface pairings, with one selected
Colour palette. Pick the palette that suits your product photography. If your products are photographed on green, a green palette will sit on top of them better than a blue one. You can enable several palettes and let PinFlow rotate through them, or narrow it to one for a tighter look.
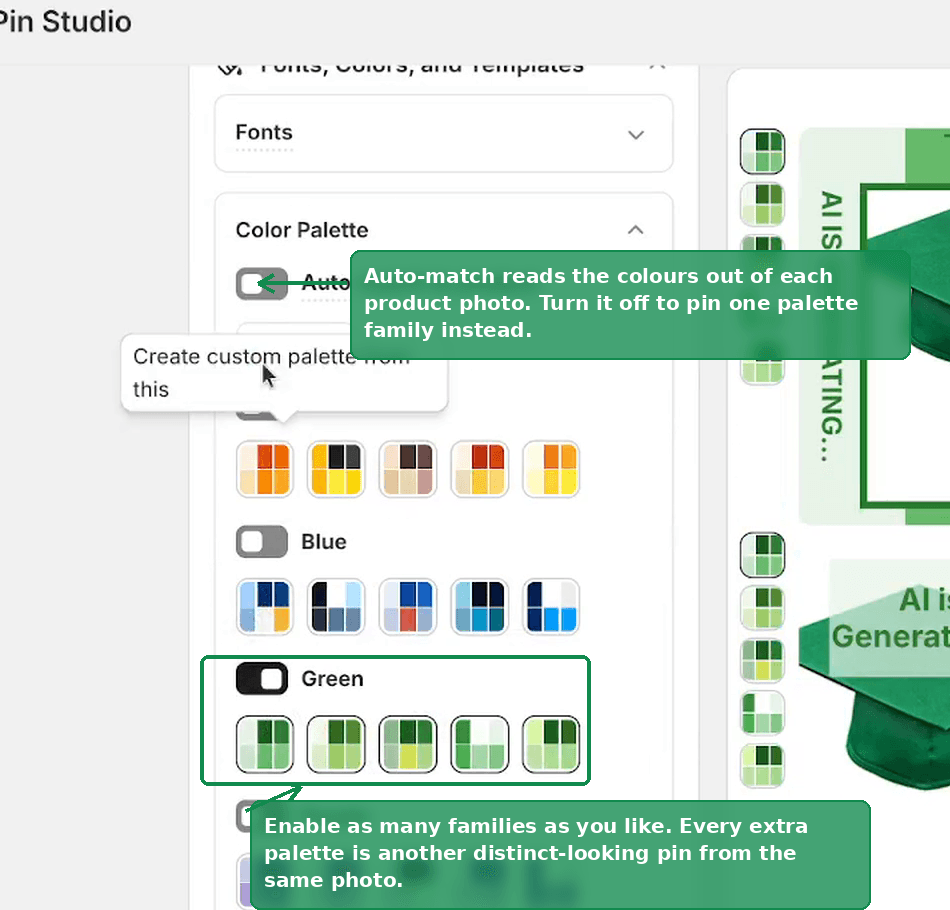 The Color Palette section with Auto-match to product, and the Green palette family switched on
Templates. Every template is enabled by default and we suggest keeping it that way. Each enabled template is another distinct-looking pin you can make from the same product photo, which is exactly what keeps a small catalog going.
Tip
More enabled templates and palettes means more variety across your queue. If you disable everything except one template, every pin in your calendar will look the same, which is the thing Pinterest rewards least.
Step 3: Tell the AI how to write
Open AI Generation. This is what writes the pin titles and descriptions.
Tone changes the style of the writing. The options are Engaging, Informative, Question, Listicle and E-commerce. For a Shopify store selling products, E-commerce is the one to use. The others suit blog and content pins better.
Language is the language the AI writes in. Set it to whatever your customers read, not necessarily the language your store admin is in.
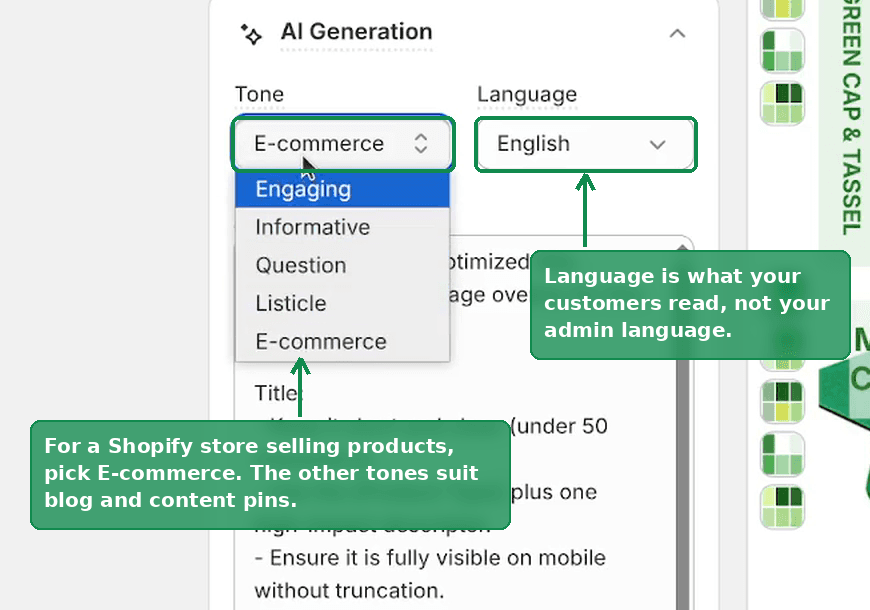 The AI Generation section with the Tone dropdown open on Engaging, Informative, Question, Listicle and E-commerce
Your Prompt is the underlying instruction the tone sets for you. You can edit it if you want the copy to lean a particular way, but the presets are a fine starting point.
Step 4: Shuffle until you like what you see
The preview sidebar shows several designs at once. The shuffle button re-rolls them, mixing different templates, palettes and product photos.
Shuffle a few times. You are not looking for one perfect pin, you are checking that the range looks right: that your text is readable on every template, that the palette does not fight your photography, and that nothing important in the product photo is being covered by the design.
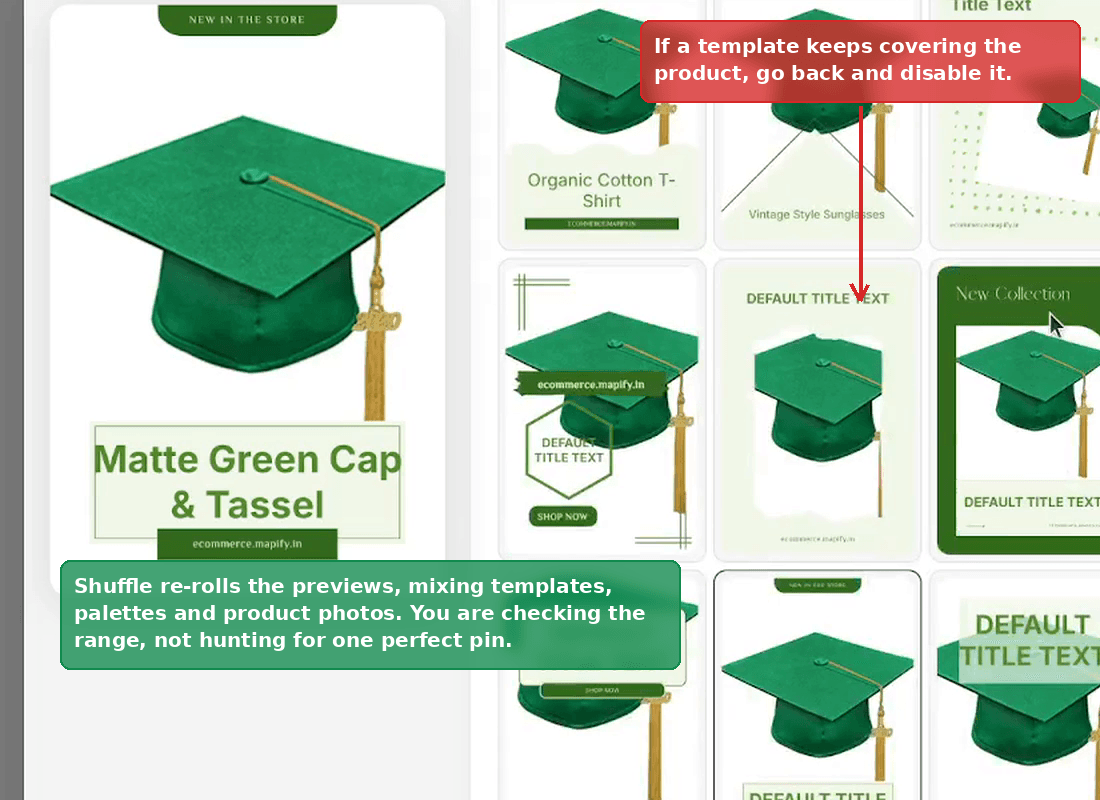 A shuffled set of pin previews, the same product laid out in several different templates and palettes
If a particular template keeps covering the part of the product that matters, that is your signal to disable it back in Templates.
Step 5: Image fit and position
Two settings decide how your product photo sits inside the pin, and they matter more than they sound.
Image display is Cover or Contain.
- Cover fills the whole pin, cropping whatever does not fit. No blank space.
- Contain fits the entire photo inside, which usually leaves empty bands at the top and bottom.
Use Cover. It is the default, and a pin with empty bands looks unfinished in a Pinterest feed. Anyone who has used Canva will recognise the same trade-off.
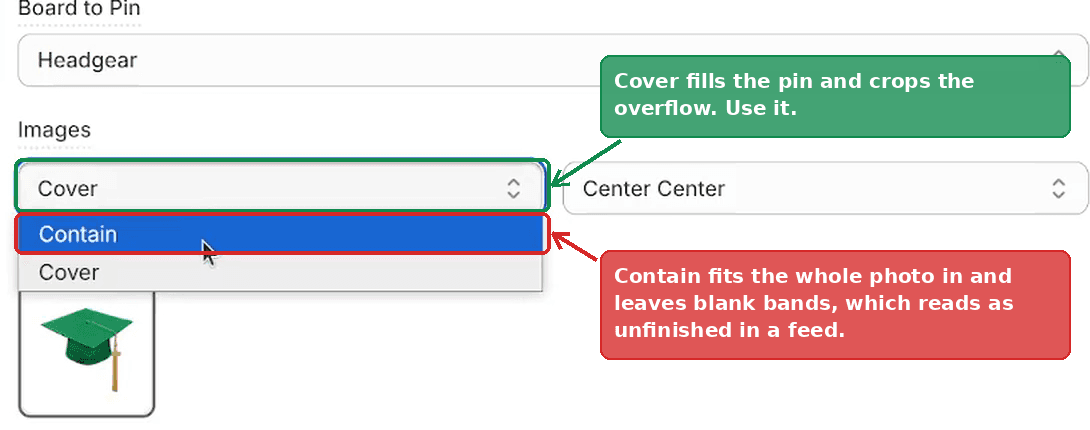 The Images row with the fit dropdown open, showing Contain above Cover
Image position decides which part of the photo survives the crop, with the usual nine positions from top left to bottom right. Center center is right for most product photos. Change it when the subject sits off to one side, for example a ring photographed in the bottom right corner of the frame.
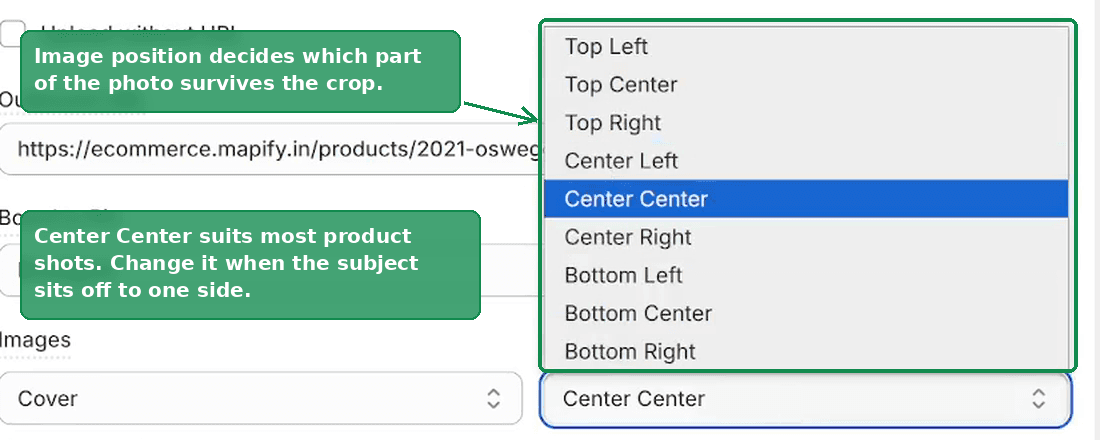 The image position dropdown open on the nine crop anchors, from Top Left to Bottom Right
Step 6: Schedule a single pin
To publish one pin from this page, open a preview and use the publish dialog. Everything about that one pin is editable there.
- Image Text is the headline drawn onto the pin itself. Type a longer line and the font size shrinks to fit automatically. This is a real difference from designing in Canva, where fitting the text is your problem.
- Title and Description are what Pinterest shows under the pin. Both are AI generated and both are editable.
- Alt Text describes the image, for Pinterest and for screen readers. It defaults to the description.
- Outbound URL is the product page the pin links to. It is filled in from the product, so leave it alone unless you have a reason.
- Board is which of your Pinterest boards it posts to.
Then pick a date and a time slot. Dates that are already full are disabled, so if everything looks greyed out, page forward until you reach dates with room. Save, and the pin is scheduled.
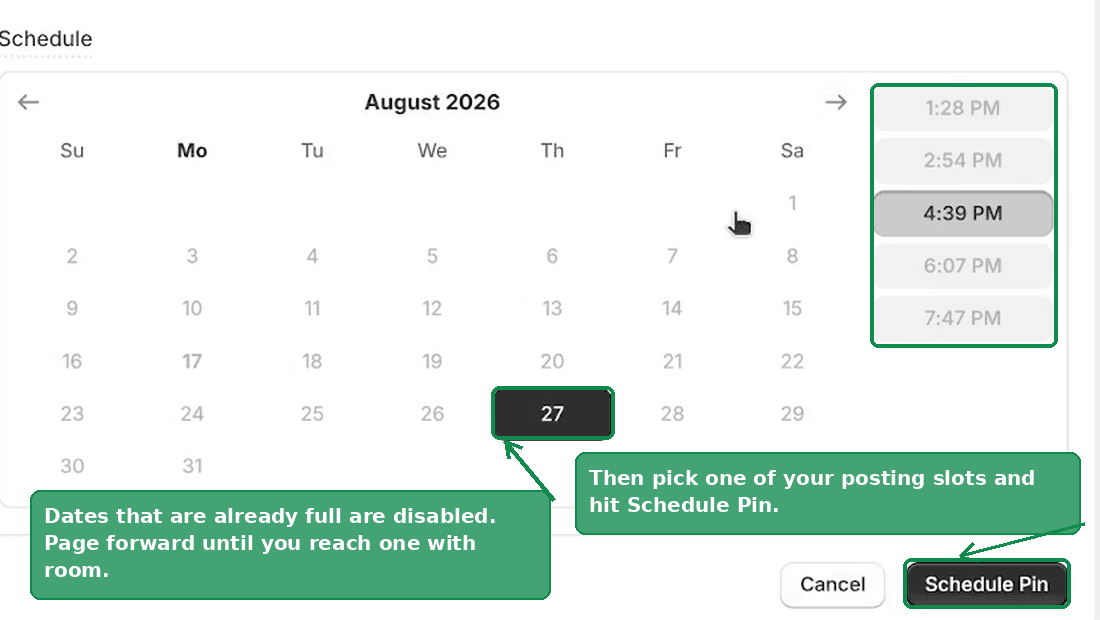 The Schedule step with a month calendar, one date selected, the posting time slots, and the Schedule Pin button
Note
If your Pinterest account is new, Publish without Visit link in Settings under URL Limits posts pins without an outbound link. Some people use this to build account trust before sending traffic. It is a setting for all pins, not just this one.
Do not build your whole queue this way
One pin at a time is the slow path, and it is not what PinFlow is for.
Once the previews look right, generate a month of pins in one run from Settings, on the Status tab. That page walks through the Generate until <date> now button and what it does. Then review the results in the Content Calendar, where you can edit, approve or reject each one far faster than building them individually.
Important
Pinterest rewards consistency and volume more than it rewards any single perfect pin. Time spent perfecting one design is time not spent posting. Set your defaults here, generate in bulk, and skim the results.
Related
- The Content Calendar for reviewing what bulk generation produced.
- Choosing Which Products Become Pinterest Pins for controlling which products these designs get applied to.
- Setting Your Pinterest Posting Schedule for when the pins go out.
Not using PinFlow yet?
PinFlow turns your Shopify catalog into Pinterest pins and posts them on a schedule, automatically. Install it and follow this guide to get your first month of pins live.
Get PinFlow on the Shopify App StoreRelated articles
Pin Studio
Upload Your Own Pin Image Instead of a Template
PinFlow used to stamp its own frame, text and graphics on every pin. Two new options skip that: a frameless template, and your own Canva uploads.
Pin Studio
Pinterest Pin Description Character Limit: What Actually Fits
The Pinterest pin description character limit is 500, and the title limit is 100. Mobile cuts both sooner. Here is what fits and how to make AI respect it.
Scheduling & Autopilot
How to Post on Pinterest Without Getting Banned
Pinterest wants a pin every day, but a 50 product store runs dry in weeks. Here is what Pinterest flags when you repeat, and how to repeat safely.